Revolution of Love

Revolution of Love

Do small things with great love.

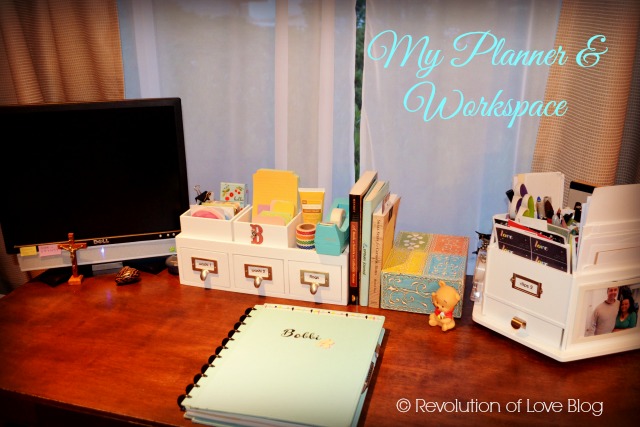
A Look at My 2014 Planner

I have always loved planners and have always had one. Whether I was a young girl making lists in my Hello Kitty notebook or single and working or staying at home with babies. I have had various sizes – pocket, compact, standard, and binder sized. Each year it changes a little to accommodate my needs.

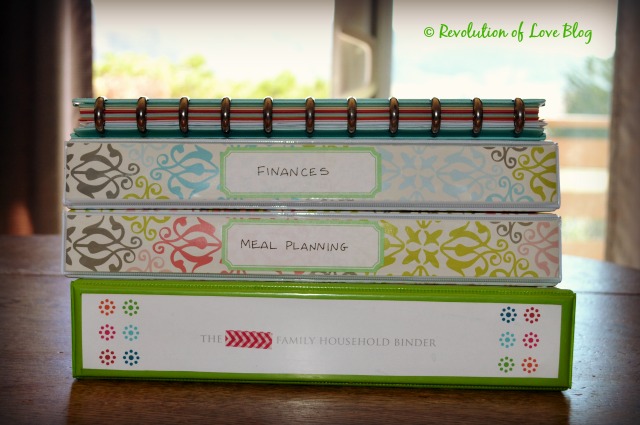
Last year I posted about my home management binder, my finance binder and my meal planning binder and they have pretty much stayed the same. However, I did get rid of my old planner and started new with a Martha Stewart Discbound Notebook. It worked so well last year that I am using it again this year.

When looking for planner sheets that work for me, they must be colorful and inviting or I’ll get bored and never use my planner. I have found my favorite planner sheets from Jen at I Heart Organizing.

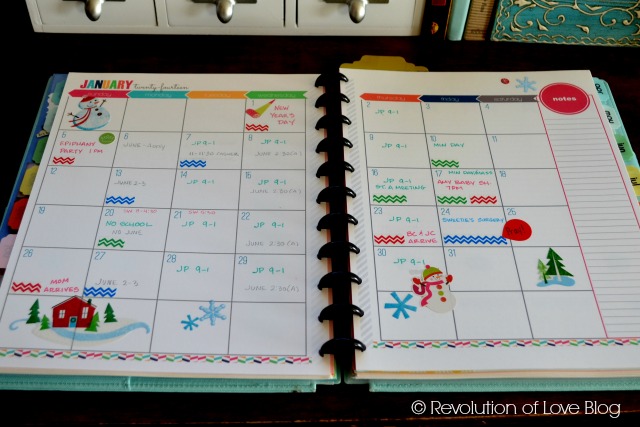
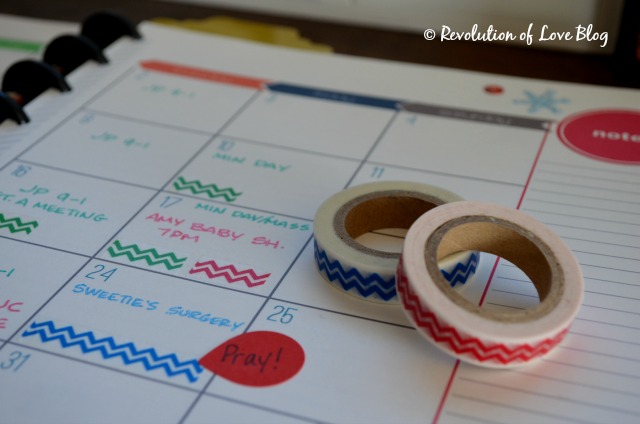
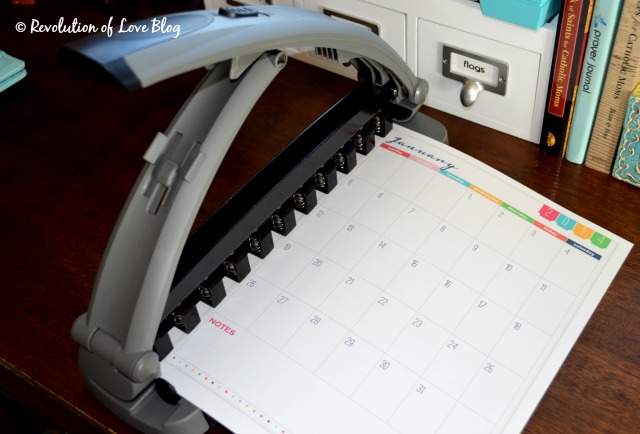
Here is the monthly calendar view.

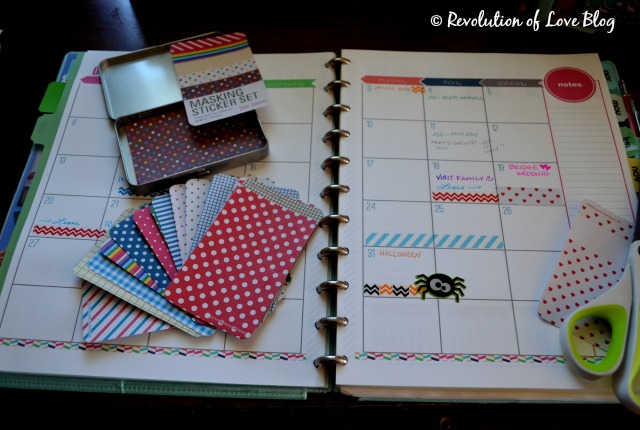
I like to color code events and appointments with washi tape. I use red for special occasions and outings. Green for school. Blue for doctor and other appointments and orange for birthdays. Sometimes I will also use flags or the Martha Stewart tear drop stickers. It depends on my mood that month. Although I like it colorful, I don’t like it too busy or it just gives me a headache. LOL. 😉

If you aren’t into washi tape, there is also this cute Masking Sticker Set. Each sheet has precut strips and dots you can add to your planner.

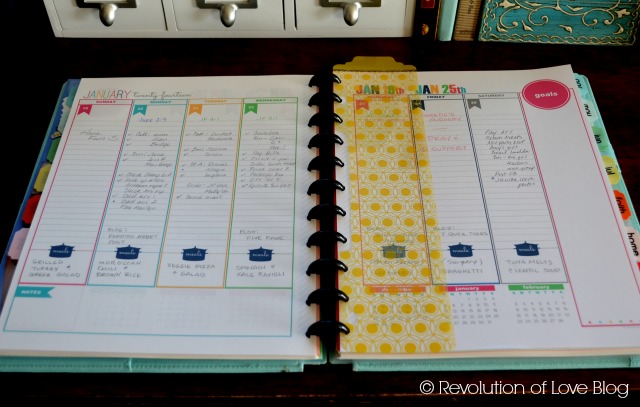
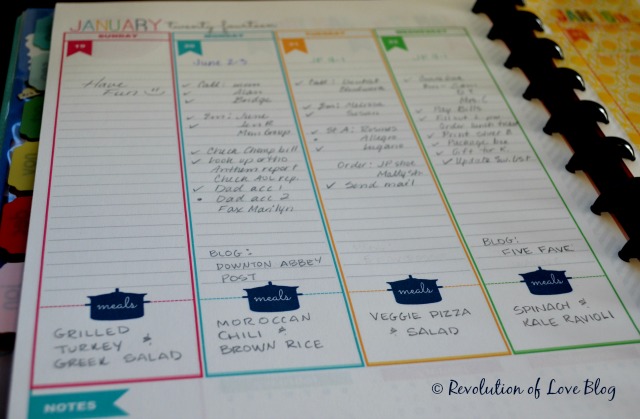
This is the weekly view. There is a long column for each day where I keep track of all my To Do’s. For my bookmarker I used one from my Project Life kits and punched holes with my Discbound Punch.

I bought the planner pages that came with a menu section so I could keep track of the week’s meals.

I also love the Discbound because, like a binder, you can add anything you want after you’ve punched holes in it. However, I prefer it to a binder because you can fold it back like a spiral notebook, rather than having to keep it open. I was a little concerned at first about the papers coming loose and falling out but I use thicker sheets so it hasn’t been a problem at all. For my weekly pages I use 32 lb white and I recently started using cardstock (65 lb, white) for my monthly calendars. It has worked perfectly.

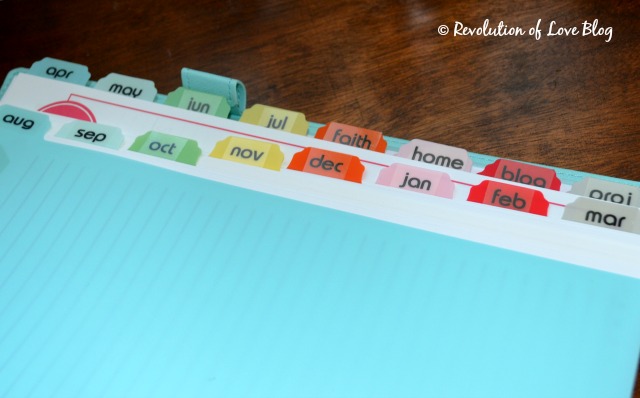
I bought two packs of Martha Stewart Discbound tabs and used my own label maker for the months. I like to follow the school calendar so I go from Aug to July. With my 4 extra tabs I have faith, home, blog and projects.


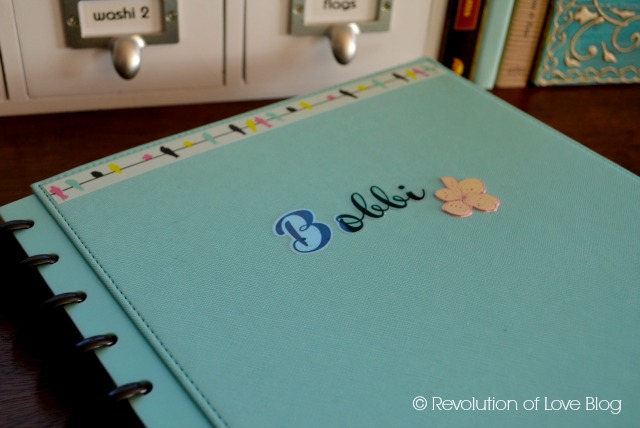
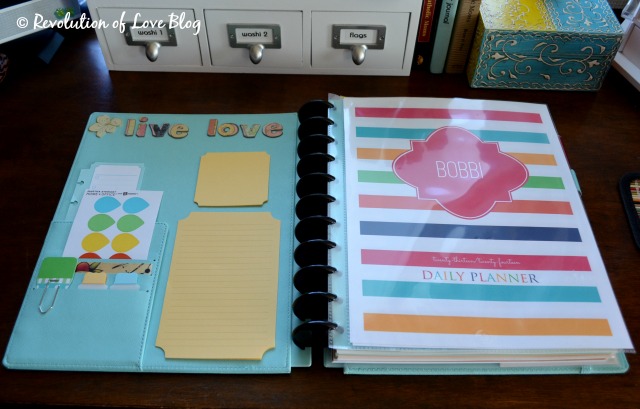
For my dashboard, I keep flags, posts, stickers and my mommy calling cards in the pockets. To keep the sticky pads in place I added glue dots to the back. The ordered the personalized coversheet.

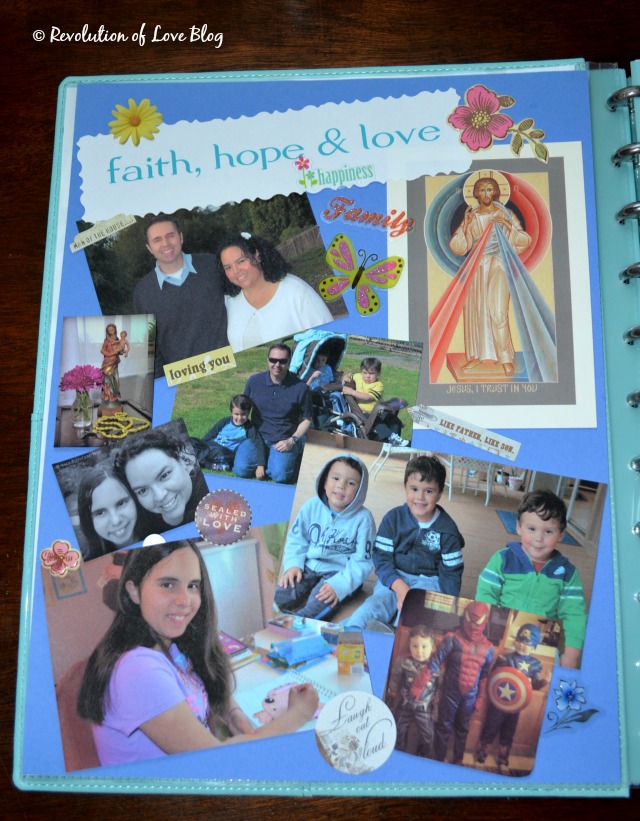
 On the other side of the coversheet, I added this collage of the ones I love the most.

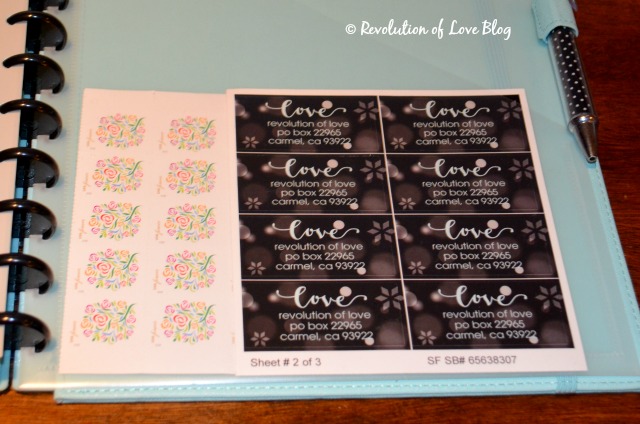
The last page of my planner is a plastic pocket where I keep things like stamps and address labels.

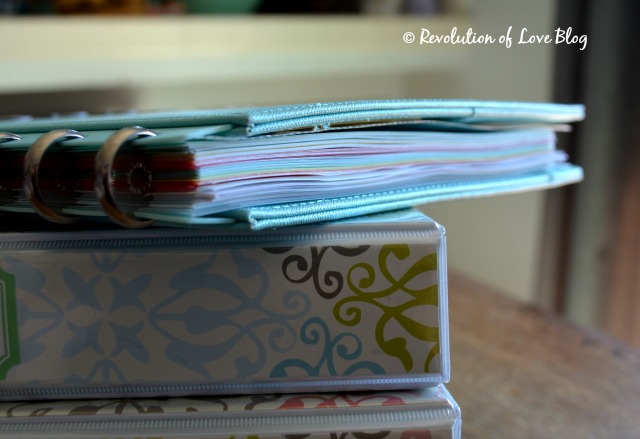
This is a photo of how thick the binder is with the standard MS discs. I bought the larger silver MS discs and hated them. I tried the larger Levenger discs (2″ I think) and they worked well but it made the notebook too big. I switched to the 1 1/2″ discs and they work great. I have extra room but it isn’t too big for me.

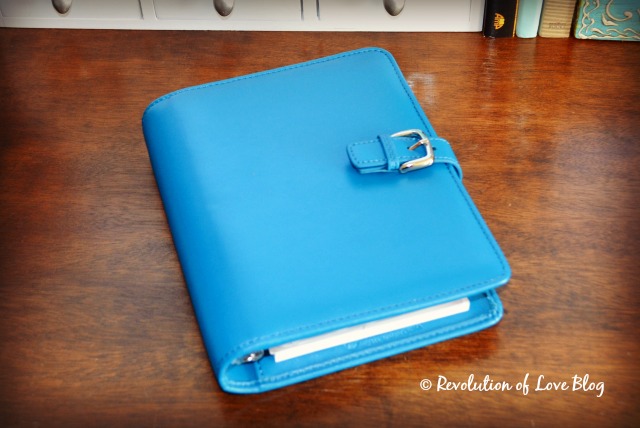
Now, although my planner is not too big on my desk at home, it is not ideal to carry around in my purse. Last month I decided to get a small planner that I can keep in my purse to take notes while I am on the run and to keep track of my daily appointments.

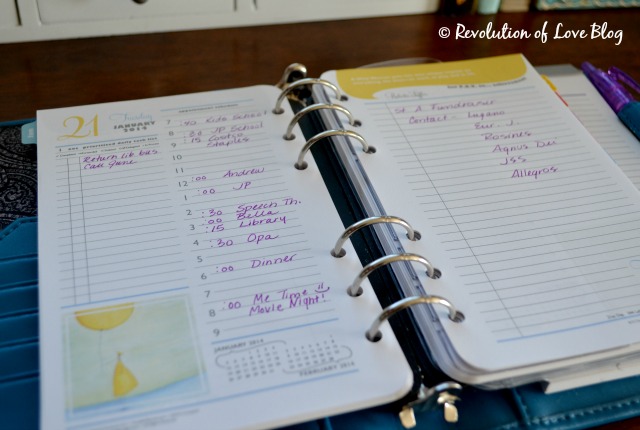
I thought about getting a Filofax but it was out of my budget and I did not like the plain planner pages that came with it. Instead I bought this Lily binder in aqua from Franklin Covey.

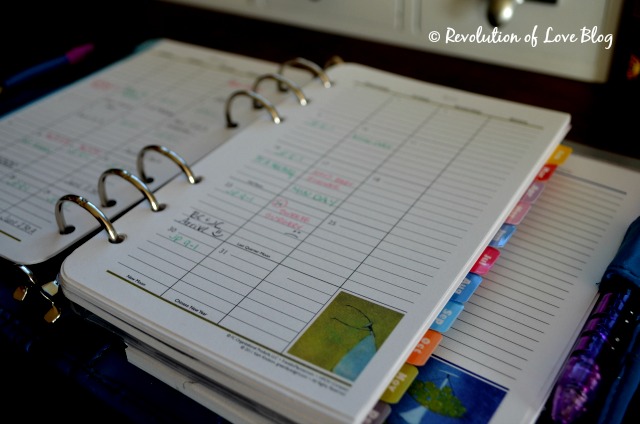
I chose the Her Point of View planner pages.

So far it has worked well. It fits perfect in my purse. I keep track of my schedule. I have space for any To Do’s I think of away from home. And I have a blank page to jot down notes. Plus, it is so cute. 😉

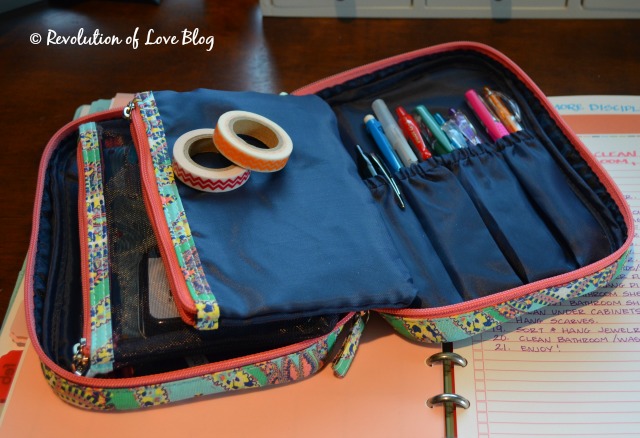
Lastly, my favorite item to go with my planners is still my traveling office. 🙂

If you are looking for colorful planner pages, I also recommend The Rainbow Planner from A Bowl Full of Lemons. I have many of her smaller planner kits and they match my current planner wonderfully. If you don’t want to spend money on planner pages, you can try this one from iheartnaptime.net. Or you can check out this list of free planners put together by Jenny at Plain Grace.

UPDATE: Looking for other planner posts? Check out these:


PS – You can follow RoL on Bloglovin, Feedly or another news feed. If you are a social media fan like me, we can stay in touch through Facebook, Twitter, Pinterest, GoodReads or Instagram. 😉


Pinterest Party & Link-up (Vol 9): Mini Traveling Office


Welcome to the RoL Pinterest Party. Join me every 2nd and 4th Tuesday as we link up and share how we made, cooked, baked, crafted, did, or created one of the pins on our Pinterest boards.

Not on Pinterest? No problem. Link-up your own creation to inspire us so we can pin it to our own boards. It can be a recipe, sewing project, Catholic craft, homeschool project, organizing/ homemaking tip, themed birthday party, whatever you’d like.

Don’t have a post ready? The link-up will be open for 10 days so there’s still time. Plus, feel free to link up a new post or an older post that hasn’t had much traffic lately.

Don’t have a blog? No problem. Post your photo and a description on the RoL Facebook page. 🙂

* * * * *

My Pinterest Boards –pinterest.com/rol_bobbi/

The Pin That Inspired This Post – The Traveling Blogger

Back in April one of my favorite organizing bloggers, Jen at iheartorganizing posted The Traveling Blogger. She talked about how she keeps her traveling “office” organized.

Source: iheartorganizing.blogspot.com

I was particularly interested in how she used a makeup bag to hold her office essentials. I was smitten with the idea and every time I went to Target or Ulta I’d browse the make-up bags to see if there was something I could use in a similar fashion. I tried a few but they landed out being too small or too big or didn’t have enough pockets and I returned them back.

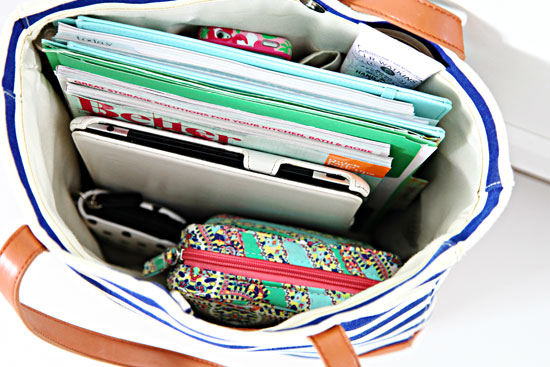
It’s August now and back to school supplies have been calling my name. I really wanted to get my traveling office together because I knew I’d be spending a lot of time in the car once school started and I was shuffling kids around and waiting in parking lots for school bells to ring. During those moments I always have a few spare moments to get some work done or a card written and mailed.

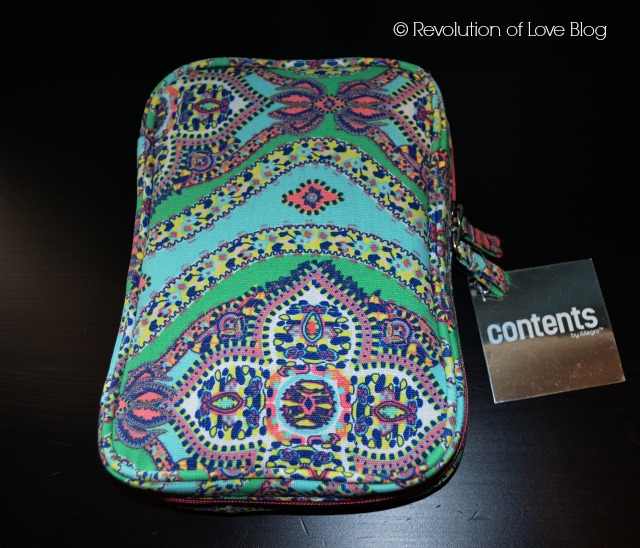
So when I went to Target this weekend, in between buying Q-tips and toothpaste, I passed the make-up bags and spotted this gem.

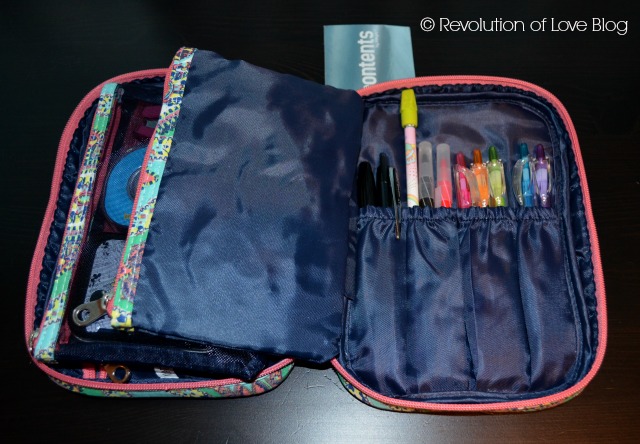
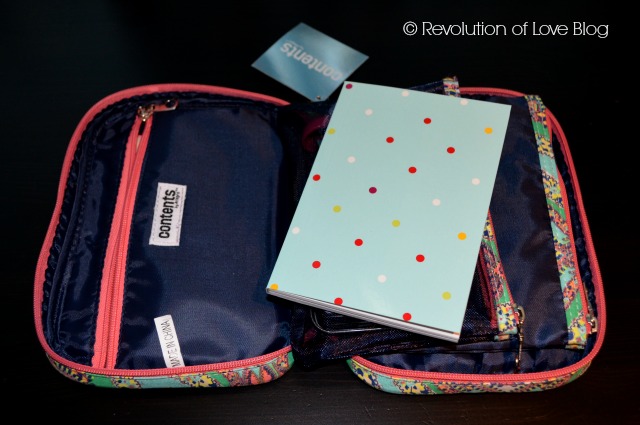
It had three zippered sections, sleeves for pens and was roomy enough to fit a lot but not too bulky for my tote bag. (I did not realize it at the time but when I went back to reread Jen’s original post, this was the exact make up bag she had purchased. No wonder she said it was perfect. It is!

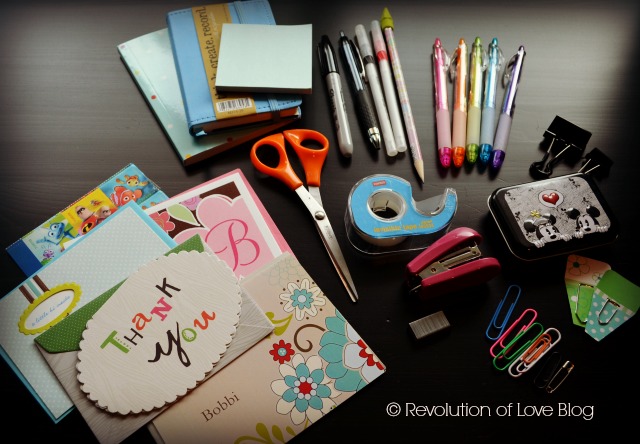
So I gathered all the things I wanted to have in my mini traveling office: a mini journal, a small notebook, post-it notes, scissors, tape, mini stapler, staples, paper clips, binder clips, a cute little tin to hold the clips and staples (thanks for that mom ;-)) sharpie, pens, markers, thank you cards, blank note cards and stamps.

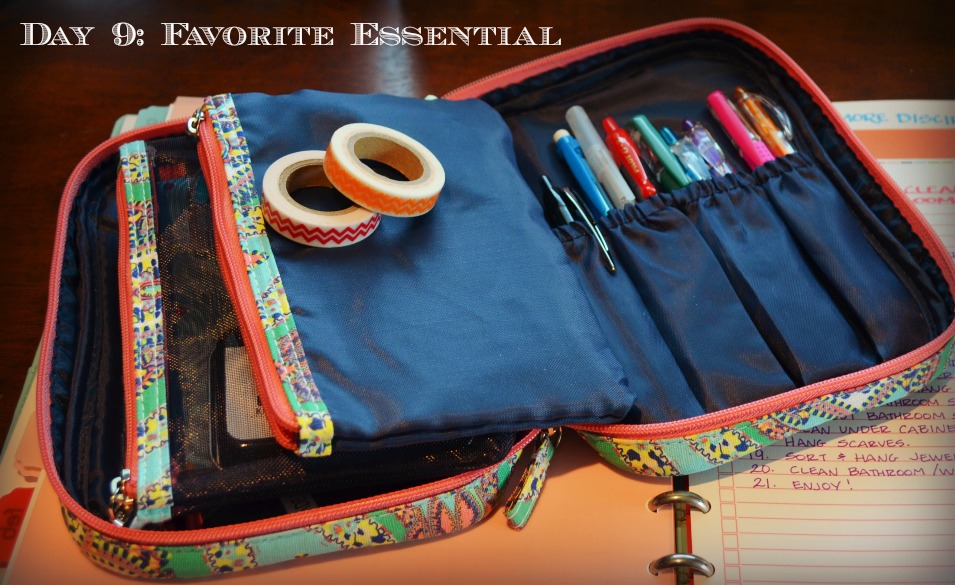
That may seem like a lot of stuff but it fit..and I even added a roll or two of washi tape since taking this pic. 🙂

**

Sometimes I feel a little bad that I get more excited about office supplies than actual makeup but what can I say. I’m a nerd that way. All I know is that I love my little office set, almost as much as the Hello Kitty pencil case I had in the 4th grade. Some things never change. 😉

UPDATE: It’s been over a month and I still love my little mini-office. Right now I am participating in the Planner Addicts Photo Challenge and for Day 9 I had to list my favorite essential while planning. My mini-office won hands down. 😉

* * * * *

Now it’s your turn.

1. Choose your creation, share about it and snap a photo if you can.

2. In your post, link back the original blogger/idea, rather than your Pinterest pin. That way credit goes to the proper person. 🙂 (But feel free to add your Pinterest profile link so we can follow you!)

3. Add a link back here so others can play along. Here is the html code:

<a href=”http://www.revolutionoflove.com/blog/?p=2157″><img title=”Revolution of Love Blog – Pinterest Party &amp; Link-up” src=”http://www.revolutionoflove.com/blog/wp-content/uploads/2013/04/pinterest_2_medW32-300×240.jpg” alt=”” width=”300″ height=”240″ /></a>

4. Link up below. Make sure you’re sending us to your actual post, and not to your general blog address.

You have 10 days to post your link, so if you can’t get things done by Tuesday, no worries, put it up when you can. We’ll be here. Have fun!

Lastly, you can follow me on Pinterest here: http://pinterest.com/rol_bobbi/. 🙂

PS – You can follow RoL on Bloglovin, Feedly or another news feed. If you are a social media fan like me, we can stay in touch through Facebook, Twitter, Pinterest, GoodReads or Instagram. 😉


Pinterest Party & Link-up, Vol 3: Organizing the Boys’ Closet

NOTE: I goofed up my dates since April had 5 Tuesdays. I posted this last week although it should have been posted today, the second Tuesday of May. So I edited the link-up. It’s open for another week. I look forward to reading your posts! 🙂

Welcome to the new RoL Pinterest Party (formerly Making It Count.) Join me every 2nd and 4th Tuesday as we link up and share how we made, cooked, baked, crafted, did, or created one of the pins on our Pinterest boards.

Not on Pinterest? No problem. Link-up your own creation to inspire us so we can pin in to our own boards. It can be a recipe, sewing project, Catholic craft, homeschool project, organizing/ homemaking tip, themed birthday party, whatever you’d like.

Don’t have a post ready? The link-up will be open for a week so there’s still time. Plus, feel free to link up a new post or an older post that hasn’t had much traffic lately.

* * * * *

As you may recall, about a year ago I started trying to organize my messy, disorganized, borderline hoarder home. I actually completed a few cool projects like fixing up my bookcase and DVD shelf but while last year was the year of homemaking, 2013 has been the year of survival. One road bump after another has left all my organizing projects forgotten. I am lucky to have dinner on the table and clean underwear in the drawers. It left me disappointed in myself but I realized I had to suck it up and deal with the fact that grand schemes were not going to work. I kept thinking of Brian’s advice to “just do a little bit every day.” Then I read Dorian’s original Pinisher post and she basically said to lower your standards, take one small step towards actually doing something and then embrace imperfection. Hmmm… that’s liberating, my friend.

So on Saturday I looked around to see what little bit  I should do that day. As I looked around the house and pondered, Matthew walked into the room with his tight high water pants and shirt that refused to cover his belly. The poor guy just turned two but he sort of skipped over his size 2T clothes and needed to go right into size 3T. That was it. I needed get rid of the small clothes and find the old 3T’ clothes of his brothers.

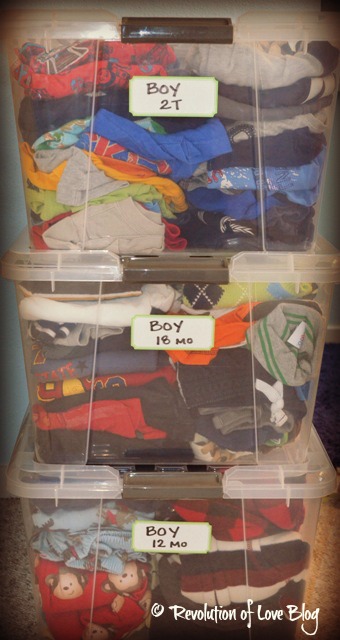
I had been really good about storing the kids’ baby clothes once they grew out of them but with three little guys close in age  and size, it got out of hand. I had various clothing items and sizes shoved in spare drawers and mixed up in plastic bins. So I went through all the clothes and put the ones that don’t fit any of them into plastic bins and labeled them. (Although I don’t think we’ll be having any more bambinos, I’m not going to give away all the clothes just yet.)

I browsed Pinterest for some closet organizing inspiration. One pin lead to this site with lots of samples.

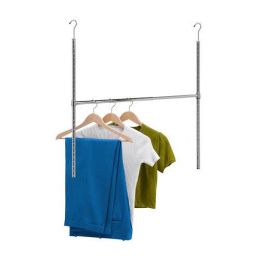
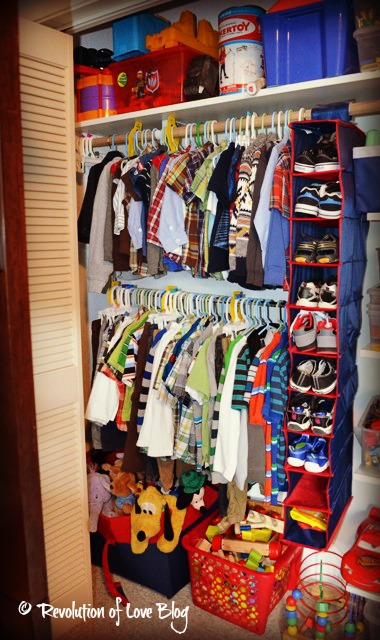
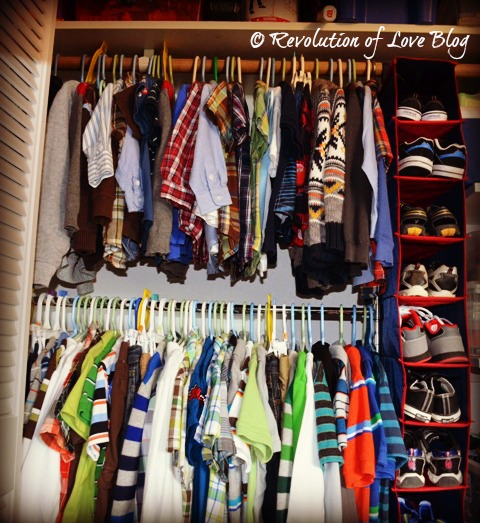
I couldn’t do anything fancy but three items really helped. The first was a hanging closet extender such as the Honey-Can-Do HNG-01816 Chrome Adjustable Hanging Closet Rod.

Second was a hanging shoe organizer such as the Honey-Can-Do SFT-01240 10-Pocket Hanging Shoe Organizer. (The one I picked up was actually from Target.)

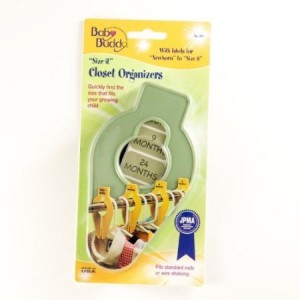
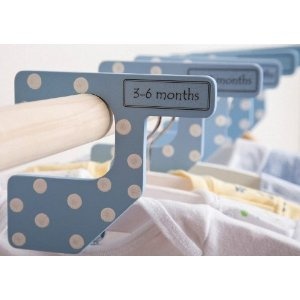
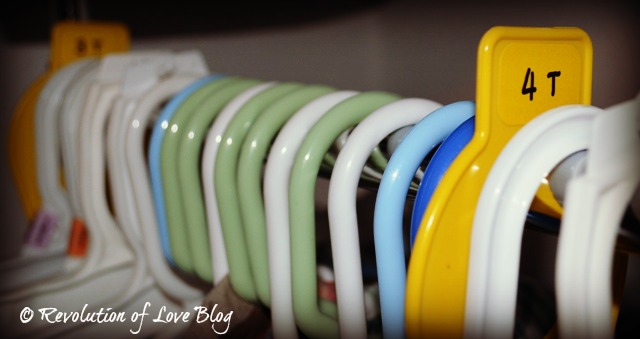
Lastly, I liked the size organizers I saw at iheartorganizing.blogspot.com. I liked the idea of having the clothes organized by size rather than by person.

I found these simple ones (Baby Buddy “Size-It” Closet Organizers) on sale so I picked some up.


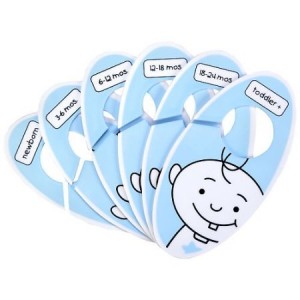
Amazon also has other cute ones such as the Sugarbooger Baby Closet Dividers in Peek-A-Boo Blue.


The Happy Closet Baby Closet Dividers come in lots of colors and patterns, such as these polka dot ones.


Although the boys play clothes and underwear went into their dresser, I hung up their other items in the closet with the double rods and size labels.

Those labels are especially great for new moms that need to sort all the new baby clothes they receive as gifts, particularly when they are in different sizes. They are also perfect to keep track of bigger sized clothes I find on sale or clearance that Andrew can wear as he grows.


It took me a good portion of the day to get everything sorted and put away in between distractions (you know, like feeding my children) and it may not seem that exciting or pinworthy but it was so satisfying knowing I was able to get it done. So Brian and Dorian were right. Lower expectations. Small and simple steps. Embrace the imperfections.

Not to mention, Matthew is much better dressed these days. 🙂


* * * * *

Now it’s your turn.

1. Choose your creation, share about it and snap a photo if you can.

2. In your post, link back the original blogger/idea, rather than your Pinterest pin. That way credit goes to the proper person. 🙂 (But feel free to add your Pinterest profile link so we can follow you!)

3. Add a link back here so others can play along. Here is the html code:

<a href=”http://www.revolutionoflove.com/blog/?p=2157″><img title=”Revolution of Love Blog – Pinterest Party &amp; Link-up” src=”http://www.revolutionoflove.com/blog/wp-content/uploads/2013/04/pinterest_2_medW32-300×240.jpg” alt=”” width=”300″ height=”240″ /></a>

4. Link up below. Make sure you’re sending us to your actual post, and not to your general blog address.

You have a week to post your link, so if you can’t get things done by Tuesday, no worries, put it up when you can. We’ll be here. Have fun!

* * * * *

Also, I’m not sure if this is legal in blogland but I linked up with Dorian for The Pinishers. (I guess I’ll find out if she kicks me out. ;-)) Last week’s theme was  HOME. This week the theme is ADVENTURE. 🙂

Lastly, you can follow me on Pinterest here: http://pinterest.com/rol_bobbi/. 🙂

Follow on Bloglovin


Operation Clean & Organize: Master Bedroom (Part 1) Meets {p, h, f, r} – vol 51


**Taming the procrastinating, ADD, mess cat within me.**
MEETS

~ Capturing the context of contentment in everyday life ~


Before I get into any photos, let me give you a little background…

Why the Bedroom? – For a long time the “master bedroom” has been on my list of organizing projects to tackle but it has been low on the list of cleaning priorities because no one really spends time in there during the day or when company is over. However, this week Leila at Like Mother, like Daughter gave us a challenge for this week’s {pretty, happy, funny, real}. I went back and read her original post about cleaning the master bedroom entitled The Reasonably Clean House: Did you guess that we’d start in your bedroom? She beautifully explains why we should start in the bedroom:

The reason is simple, but profound. Your home has many areas that express family life, but your bedroom expresses the foundational relationship between you and your spouse — the inner sanctum where the sacrament of your marriage is consecrated and continually renewed with the conjugal gift.

If it weren’t for the intimate aspect of your commitment, your family would not be. God has ordained it so. It was that way from the very start. It has always been that way. It always will be that way.

That reality should be expressed in your respect for this physical place, for your body, for the body of your husband. Your first steps should be to make the room — the bed and the places for your clothes — truly orderly. (Read the rest here.)

A Little Sanctuary – As I was reading this I thought about Brian and all he does for me and for the family. He works so hard and puts up with all our craziness and although he never shows it, I know there are times when he just longs to be able to sit and read or write or pray in quiet. I wanted to make an area in our bedroom where he could do that. So with that in mind, I started my quest.

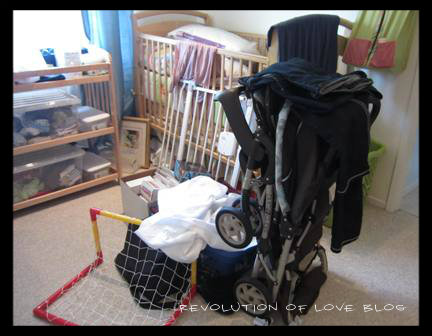
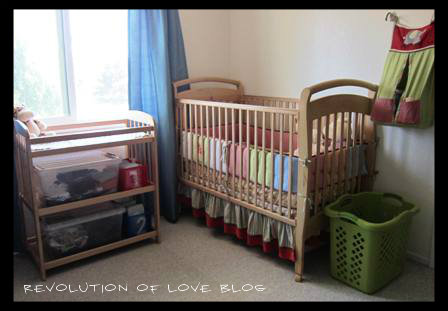
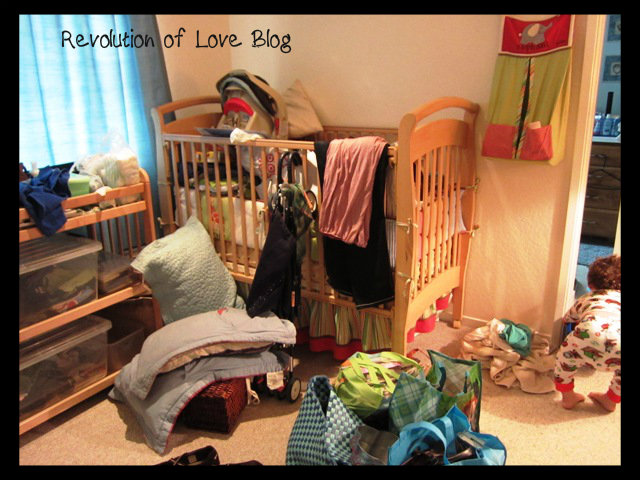
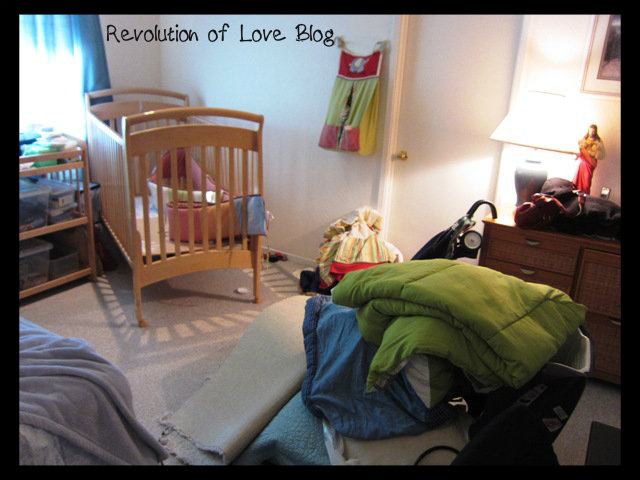
Déjà vu – Back in June when I wrote a post about NFP and Hallie’s challenge to make a Rockin’ Love Nest, I worked on clearing our bedroom up. The corner of my room holding the baby’s unused crib was my biggest problem. It looked like this in June.

{real}


Then I put everything away and it looked like this.


Fast forward a few months, and we had all the carpets in our house cleaned except the master bedroom. (The carpet was still new in this room so didn’t need cleaning yet.) That meant that everything from the other rooms went into our bedroom. That was a month ago yet the corner of the room still looked like this as of yesterday morning.


I figured that the only way to stop my habit of using the empty crib as storage/dumping ground was to get rid of the crib. Matthew didn’t sleep in it anymore and I didn’t see any babies coming in the near future (did I just tempt Murphy’s Law?) so I put everything away and took the crib down.

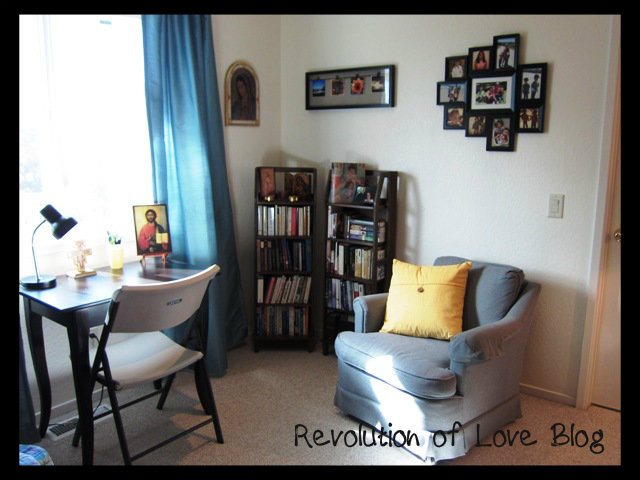
I then moved Brian’s small desk in front of the window where there is a view of our tree and the mountains surrounding our little valley. I added to the corner the small shelves (that used to hold video cassettes…remember those?) and the extra chair that sat at the opposite end of the room.
Here is the result.

{pretty}

{happy}

I love all the little details that helped add to the corner.

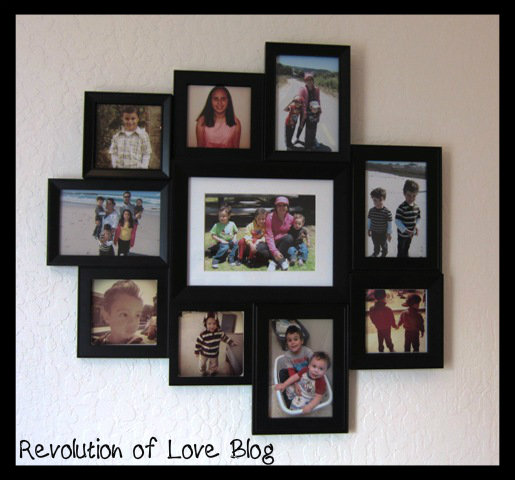
I placed on the wall two picture frames I bought at Target ages ago. They have been waiting in my closet for me to get my butt in gear. In the first one I placed family photos.

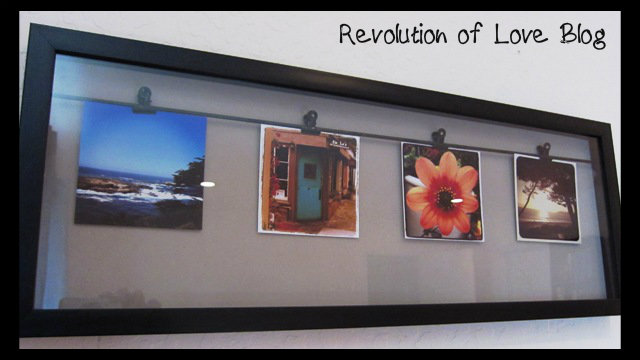
In the second one I put a couple of my Instagram photos. (Unfortunately, I made note cards with my favorites and this is all I had left.)


I also added Our Lady of Guadalupe.


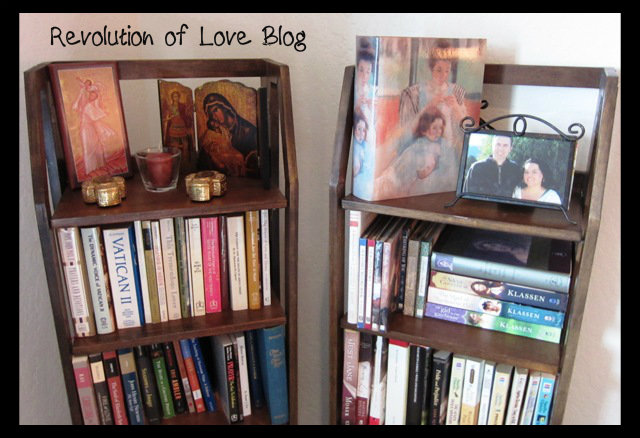
I put some of Brian’s books on one shelf and mine on the other. (We have a ridiculous amount of books in our house but that’s another project.)


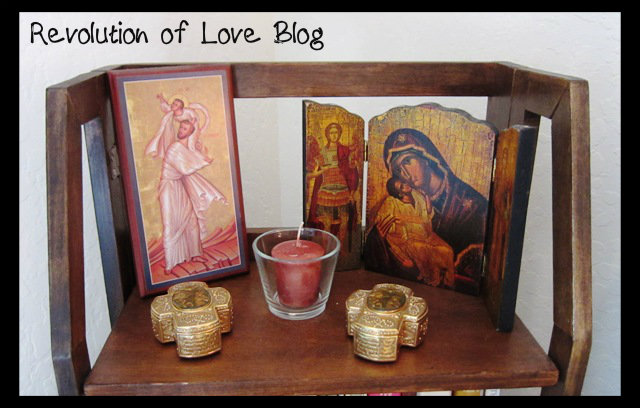
On top of Brian’s shelf I made him a little prayer corner with his favorite icon of St. Joseph, our icon of Our Lady that has accompanied us to the hospital at the birth of each of our children, the little rosary holders we received at our wedding and a fragrant candle that smells like autumn.


I am so happy with the results, but nothing could have given me greater pleasure than to hear Brian gush over the room. Anyone that knows Brian, knows he is not a gusher. I usually get a “that’s really nice” and that’s it. But he was really surprised and so pleased. He went on and on. Later that evening I heard him telling Bella, “Did you see how Mom fixed up our room? Doesn’t it look nice??” I couldn’t help but smile. It made it all worth the blood, sweat and tears to get there.

{funny}

I admit, it wasn’t an easy project. The worse part was at the half way point. I needed to leave and attend John-Paul’s parent teacher conference at school and I knew if I broke the momentum it would be hard to get back into it. (It’s like cleaning out your closet and once you move everything to the top of your bed you wish you never started the project in the first place. LOL.)


Plus, it was hard to clean when I had to stop every five minutes to check on the kids. JP kept himself relatively busy but Matthew was in rare form – he scribbled on a wall, dumped out cabinets, danced on the table, climbed into the dishwasher and broke a glass on the sink, spilled milk all over the floor, wrote on the tv with a crayon…just to name a few.

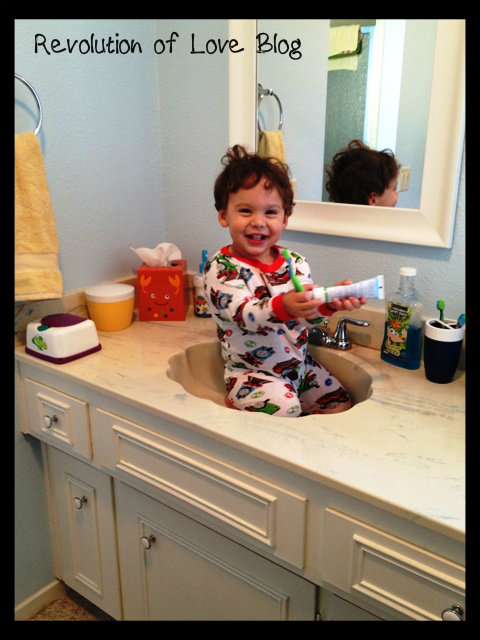
I also heard JP say, “No, no Matty!” which is my cue to see what mischief he is into. As it turned out he also found a new place to play. He was brushing his teeth IN the sink.


I could not figure out how he got in there! We have a low step stool for the boys to step on to wash their hands but it is too low for him to get that high. I put him down and watched him as he climbed up again. He was able place his toes on the small borders of the cabinet and hoist his chubby little body up onto the sink. I’ve got a future rock climber.
So that is this weeks’ edition of OC&O and {p, h, f, r}. I still have more to do in the bedroom but I’ll save it for next week. In the meantime, I’ll be heading to confession tomorrow. I chalked up a fair amount of cussing, anger and impatience in the last 24 hours. 😉


PS – (11/10/12) This morning I received an email from Leila that said in part:

“Great job on your bedroom! You really transformed it, and I LOVE the prayer shelf on the bookcase. What a thoughtful touch!

I wanted to let you know that I would comment on your post, but I just can’t sign in to do it. There are so many posts, and so many of those ANNOYING verification things (that keep not working), and having to SIGN IN is the last straw. Just. Can’t. Do. It….”

LOL, a big thanks to Leila for her kind words. But I wanted to let you know, particularly the others who have emailed me about not being able to comment, that I am in the process of moving the blog over to WordPress. I hope to have the new blog up in a couple weeks, depending on how much free time I can squeeze out of my day… yeah, you better make that a few weeks. In the meantime, thanks for stopping by! xoxo!

PPS -You can follow RoL on Bloglovin, Feedly or another news feed. If you are a social media fan like me, we can stay in touch through Facebook, Twitter, Pinterest, GoodReads, Letterboxd or Instagram. 😉

Operation Clean and Organize: Vol 16 – The School File

logo_med.jpg

**Taming the procrastinating, ADD, mess cat within me.**


With three kids in school, every weekday afternoon we have a barrage of school papers coming through the door – homework, project assignments, permission slips and completed schoolwork. I would find them scattered all over – on my desk, on the dining room table, on the prayer altar, or worse, in Matthew’s hands. I decided I needed a file to keep everything in one spot.
I went to my home away from home, Target, and found just what I needed. I purchased a Greenroom Eco hanging file folder and folders.

sch_file_2.JPG


s_file_8.JPG

I already had a bunch of green hanging files I could use.

sch_file_3.JPG

I then labeled the folders and placed them in the file.

sch_file_4.JPG


sch_file_5.JPG

Now when the kids come home, they empty out their backpacks and each paper goes into its proper file. Completed homework that we don’t need for future reference/studying goes in the recycling bin. (A few select art projects go in a larger scrapbook/file that they can keep.)
I also love that the file it portable so whether Brian takes it to the dining room table to work with the boys or I take it to the family room to fill out paperwork, it can easily be moved. I also clipped a sheet of notepaper to the front and jot down any projects we need to be working on and when they are due.
This was a simple project but it has already made a huge difference!

sch_file_6.JPG

Now I just need a way to organize all the backpacks, lunchboxes, school jackets etc in the front door entryway. I am seriously considering buying one of those preschool locker sets that the boys have at their schools. It may not be the usual house decor but it would make things so much neater! If you have any other suggestions to keep it in order, PLEASE let me know! Thanks!

2_signature.jpg