Revolution of Love

Revolution of Love

Do small things with great love.

Operation Clean and Organize: Vol 10 – The Refrigerator

logo_med.jpg

**Taming the procrastinating, ADD, mess cat within me.**


I am short on time today so this will be a quick one. I have already posted these photos of my fridge but not in the context of Operation Clean & Organize. I’ve been relatively good at keeping my fridge clean since I usually clean it out every week or two. On Sundays Brian always makes the family breakfast. After breakfast I wash the dishes and catch up on a little kitchen cleaning – like the fridge. I check what food or leftovers need to be eaten and plan the week’s menu around those items. Keeping on top of things makes my meal planning a lot easier and eliminates the problem of wasted food that we used to have.
Here is what my fridge basically looks like – including a munchkin looking for a snack.

23x5.JPG
To organize the fridge I got rid of the 101 mismatched reusable containers that overran my kitchen cabinet and I bought a big box of Rubbermaid Premier Containers when they were on sale at Costco. The lids and containers stack together so I keep the larger ones in my regular plasticware cabinet and the small and medium sized ones in one of my kitchen drawers.

fridge1.JPG
The second best (if not best) investment I made was purchasing a number of Fridge Binz (see links below) for jarred items and lunch items like yogurt, jello, juice boxes, etc. I. LOVE. THEM. It makes finding things in the fridge much easier. Instead of rummaging for the tarter sauce or pickled relish that is stuck at the back of the fridge, you simply pull out your bin and there it is!

fridge2B.JPG
Here is the side view of the narrow bin.

fridge3B.JPG
I use these for our inside fridge and our outside fridge. If you’re interested, here they are. The also have shorter ones, ones for coke cans and pantry styles available. Just search “fridge bins” on Amazon.

2_signature.jpg


Operation Clean and Organize: Vol 9 – Our DVD & Movie Shelf


**Taming the procrastinating, ADD, mess cat within me.**


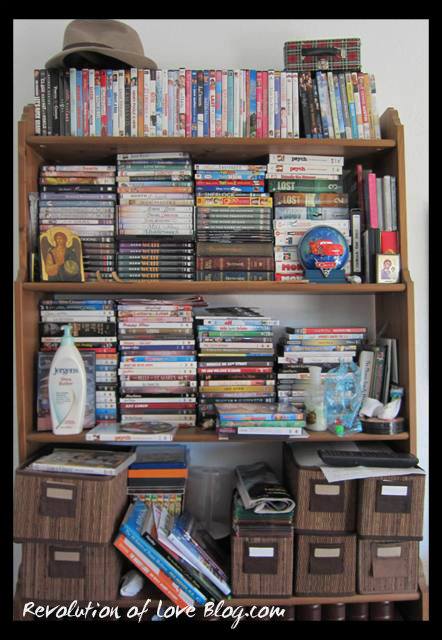
Last week I worked on my DVD shelf. Over the last decade Brian and I have collected a crazy amount of DVD’s – both store bought ones and movies we recorded onto blank DVD’s. I couldn’t fit them all on our shelf! Not only was it overflowing with movies, but also with other junk it had collected.


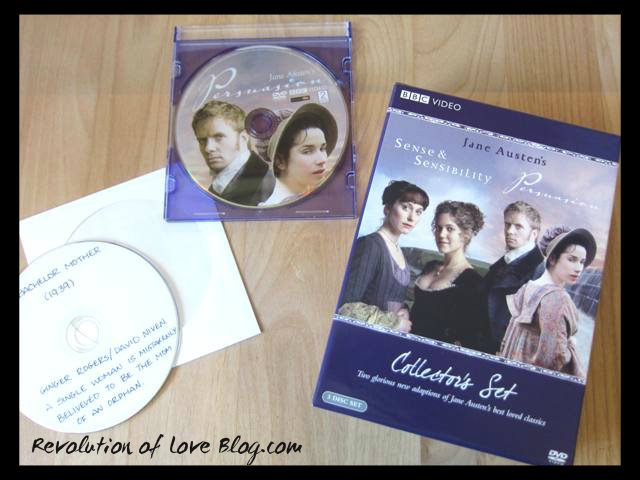
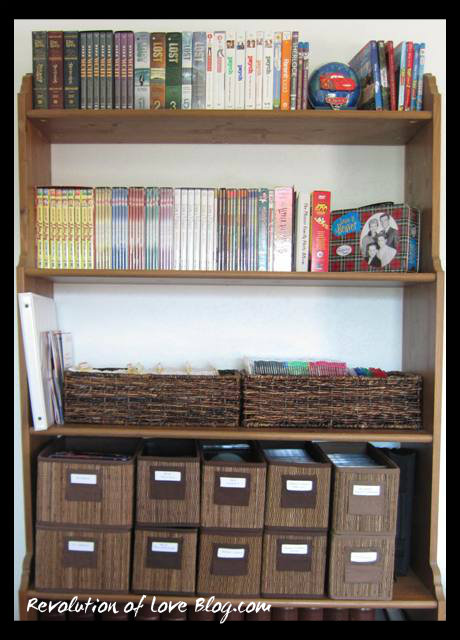
I finally decided to get rid of the DVD cases and placed the discs in space saving CD cases. For the DVD’s we recorded, I placed them in white paper sleeves.


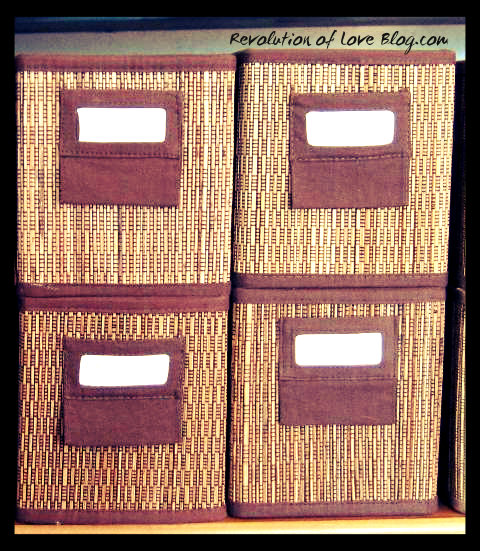
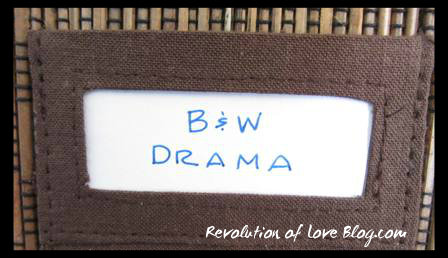
I had a bunch of media baskets I bought at IKEA ages ago. I used those for my regular DVD’s and labeled them by category.


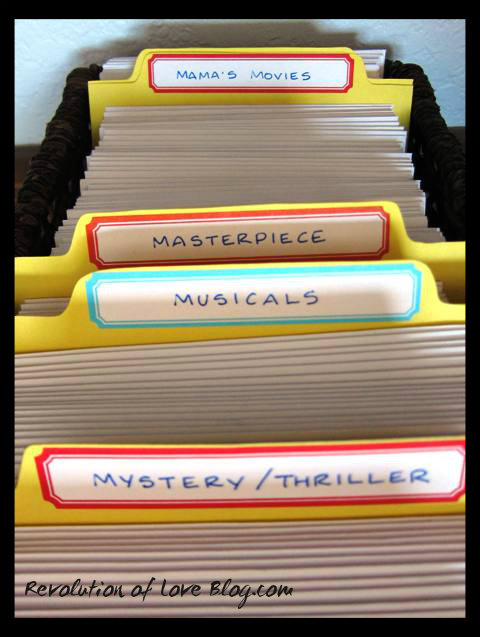
I put the paper sleeved DVD’s in a long basket I picked up at Target. I cut down two file folders into mini files sleeves and labeled them.


Here is what the final shelf looks like. I kept the TV series box sets (Like Lost, Psych and I Love Lucy) on the top two shelves. The third shelf has the baskets of paper sleeved DVD’s and the fourth shelf the CD cases with DVD’s. A big improvement. I debated whether or not to get new colorful baskets but it would be silly to spend money on new ones when these will work fine, even if it looks a bit “brown.” LOL. To keep track of the movies we own, I’m almost done listing them and placing the sheets in a binder for easy reference when we need to decide what to watch for movie night. šŸ™‚


Operation Clean & Organize: Vol. 8 – The Kid’s Bathroom Counter

logo_med.jpg

**Taming the procrastinating, ADD, mess cat within me.**


When we remodeled the house and added a bedroom, we closed off the old master bathroom and made it into the kids’ bathroom. It has only one sink but a long countertop. Invariably, there were various toiletries and clothes thrown all over the counter. To try and keep things a bit more organized, I placed a basket on the counter for each child. (I bought these plastic baskets/bins at Target.) Inside their basket were extra diapers/undies and any products they alone used.

bath_2.JPG
I placed name tags above their basket to remind them of which one is theirs. After they dress in the morning I also have them fold their pj’s and place them in their basket for the next night. (Although “wad” would describe it better than “fold.”) It has worked out well and eliminated the need to search through sheets and under beds for their pj’s before bedtime.

bath_3.JPGbath_1.JPG
There is another small counter in the bathroom that I use when we have guests. I have extra bins and labels with the names of frequent guests – such as my mom who spent a few days with us while I was out of town.

bath_5.JPG

bath_4.JPG
I keep one bin for them to put their toiletries and things and one basket filled with extra shampoos, lotions, toothbrushes etc for them to use while they are visiting. I don’t have a picture if it here but along with their towels I’ll have a little welcome gift for them – chocolate or mints, a burned CD of favorite songs, a special soap or lotion in their favorite scent, stationary or mini-photo album, a favorite magazine or snack (best choices for when my brothers or dad come visit.) I just think it’s a nice touch to let my family or friends know that I am happy they are visiting our home.

2_signature.jpg


Operation Clean & Organize: Spring Cleaning Review

logo_med.jpg

**Taming the procrastinating, ADD, mess cat within me.**


It seems that since the holidays last year, I haven’t been spending any time on my cleaning and organizing projects. However, now that spring it here, it is time to get back to work! I thought I would go over the segments of Operation Clean and Organized that I have done so far and to see if I have been keeping up with the organization.
Vol 1: Cleaning Charts & Recipe Clip Board – My master project list is still being used and I am slowly crossing off the projects as I get to them. The daily cleaning chart is sometimes used (usually when my brain is so scattered I need to remind myself what to do first) and sometimes forgotten (usually when I am running around all day and haven’t been home more than a few minutes.) I still use my clipboard for that week’s recipes all the time. I love it. I’ll have to try and post my almost done recipe binder next week.

cab_1.JPGcab_3.JPG
Last week, I also added this small fabric board from Target to the little wall on the other side of my fridge. I haven’t put anything on it yet but I love the bright pattern.
cab_4.JPG

Vol 2 – Weekly Menu Board
I still love my menu board and use it every week! I did need to make more blank labels to write in the names of new meals I’ve tried since then.
menu_4.JPG

Vol 3: Shopping Lists & The Outdated Pantry
My fridge shopping list has changed a little but the rest are still working.

Vol 4 – The Cupboards/Pantry (Part 1)
I don’t think I’ll ever be fully happy with this mini-pantry since it is so narrow but so far it is okay. The mini drawers work great. The stacked baskets are okay and I finally replaced the random black one with a white basket.
pantry_8.JPG
My only complaint is that when I want something from the bottom basket I have to lift all the others to get my hand in there. I would love to get bins like this from The Container Store but even their mini sized ones are 9 Ā½ inches wide and my shelf has a depth of 8″ so I wouldn’t be able to close the door. So for now, I will have to stick with what I have.
bin.jpg
As for the master pantry lists and rubber band-hook to keep the little kiddos out, still works well.

Vol 6 – The Cupboards/Pantry (Part 2)
The pantry still looks good but I do have to stay on top of it. I did however update my spice rack. The last time I just used mini labels and wrote the names of the spices. When Martha Stewart came out with her Avery labels, I loved the round ones, especially since it had a red border. (In case you haven’t noticed, I love red!)
I think they look a lot better!

spices1.JPGspices3.JPG

Vol 5 – My Desk AND Vol 7 – Book Shelves & Desk Area
My desk area still looks good but it is a CONSTANT job to daily sort out and put away the various things that pile up when I am not looking. However, it is a job I don’t mind doing since it is my little corner of the house and it makes me happy to see it neat and nice looking. Now I just have to work on taming the cords underneath the desk. (BTW, I have to keep the big throw pillow in front of my chair to block munchkin hands from putting cheerios into the CD drive of the computer.)
desk.JPG
Earlier this week, I was at the craft store and bought some ribbon and card stock to make labels for the top four bins on my side bookshelf. I got a lot of great suggestions from a commenter (thanks, Kate) but as hard as I tried, I didn’t like the way it looked on these fabric bins. I wanted a plain, clean look. However, I still liked the idea of the ribbon and labels so I used it instead for the baskets I am using to redo our DVD shelf. It worked great for that. (I’ll post the results when I complete it.)
When I bought the Martha Stewart labels for my spice jars I also picked up a pack of oval red border labels. Yesterday I tried sticking one to the fabric bin and it stayed on perfectly (since they were out of reach of curious little hands.) I used some black letter stickers to label the bins and I like the clean look with a minimal amount of money spent.

bookshelf_7.JPGbookshelf_8.JPG
Well, that’s it for now. Hopefully, I’ll have another complete project to post next week. Have a great day!

2_signature.jpg


Operation Clean & Organize: Vol 7 – Book Shelves & Desk Area

logo_med.jpg

**Taming the procrastinating, ADD, mess cat within me.**


For the last two weeks I have been working diligently on organizing a section of my home that I use constantly. In one corner of our front room I have my desk with our computer and “work” area. On the wall to the left of my desk there are four large book shelves. (Can you guess that Brian looooves to read?) However, in the process of cleaning, every time there was something I needed to take to another room, I would stash it on the shelf and put it away “later.” Well, it was finally time to tackle the shelves and put away all the collected junk.

bookshelf_1b.JPG

bookshelf_3b.JPG
Two weeks ago I posted about organizing my desk. I am happy to report that each night I put away anything that does not belong there and it continues to look nice. (Trust me, that’s a miracle in itself.) But this still left the one book shelf next to my desk that housed all my things. It drove me nuts every time I sat down at my desk to work.

bookshelf_2.JPG
I was at Target the other day (I really should buy some stock in their company since I spend so much time there) and I found these cute fabric bins in a red floral pattern. I bought six of them in various sizes. (Note, they sold out quickly in our store but I did find them online if you don’t mind buying them in sets. They are also available in aqua blue, orange, lime green and black. Other patters were ovals and zigzag lines.)

bookshelf_4c.jpg

Small red floral bin.


bookshelf_4d.jpg

Medium red floral bin.


bookshelf_4e.jpg

Large red floral lidded box

.
Target also had these magazine files for only $4.99, although our stores didn’t carry them in red. Thankfully, my mom searched her Target 400 miles away and bought me the last two since I couldn’t order them online.

bookshelf_4b.jpg

Red magazine file


.
My sisters brought them to me when they came to visit this weekend and I finished organizing my shelf this morning. I love how much better it looks! It actually brings me joy to look at it. And it is crazy that when I was looking for something, instead of searching through piles I knew exactly which bin to look in to find it. I tell, you this organizing business is really starting to make sense. šŸ˜‰

bookshelf_5b.JPG
bookshelf_6.JPG
I was thinking about labeling the top four bins but I’m not sure the best way to label a fabric bin. I’ll have to go back to my Pinterest organizing board for inspiration. I’ll let you know if I find something I like.
Until next week’s post, happy organizing!