Revolution of Love

Revolution of Love

Do small things with great love.

Pinterest Party & Link-up (Vol 26): Southwestern Black Bean and Corn Salad

Welcome to the RoL Pinterest Party. Join me every 1st Tuesday of the month as we link up and share how we made, cooked, baked, crafted, planned, organized, followed or created one of the pins on our Pinterest boards OR share something original that others can pin onto their boards.

Not on Pinterest? No problem. Link-up your own creation to inspire us so we can pin in to our own boards. It can be a recipe, sewing project, Catholic craft, homeschool project, organizing/ homemaking tip, themed birthday party, whatever you’d like.

Don’t have a post ready? The link-up will be open for a month so there’s still time. Plus, feel free to link up a new post or an older post that hasn’t had much traffic lately. πŸ™‚

* * * * *

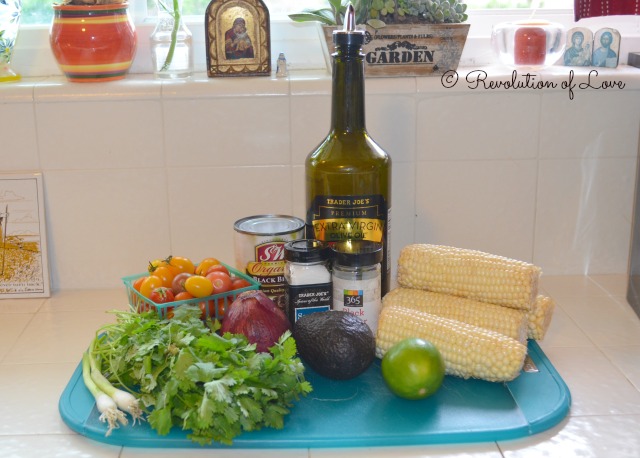
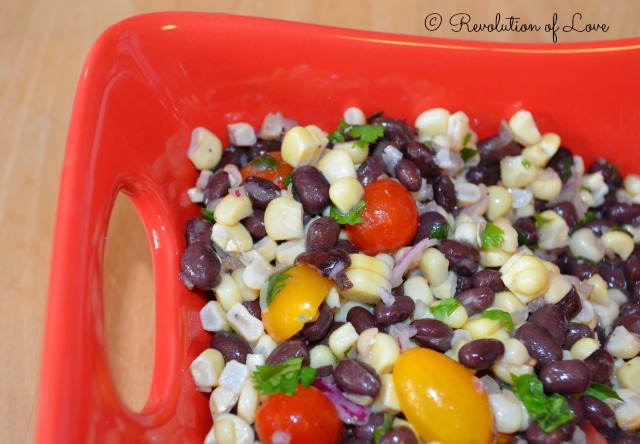
I tried this recipe at the beginning of summer and we liked it so much that we have had it countless times since. It is theΒ  Southwestern Black Bean Salad from Skinny Taste.com. I changed it a little to suit our taste.

Ingredients

  • 1 can black beans, rinsed and drained
  • 4 fresh corn cobs, cooked and kernels removed.
  • 1 handful of cherry tomatoes, halved; quartered is they are “Costco” large.Β  (or 1 regular tomato, diced)*
  • 1/2 medium red onion, chopped
  • 2 limes, juiced
  • 1 tbsp olive oil
  • 1/4 bunch of fresh cilantro, stems removed and chopped
  • dash or two of garlic powder
  • salt and fresh pepper to taste
  • (optional) 1 hass avocado, diced to top each serving**
  • (optional) For a spicy dish, add 1 diced jalapeno

Directions

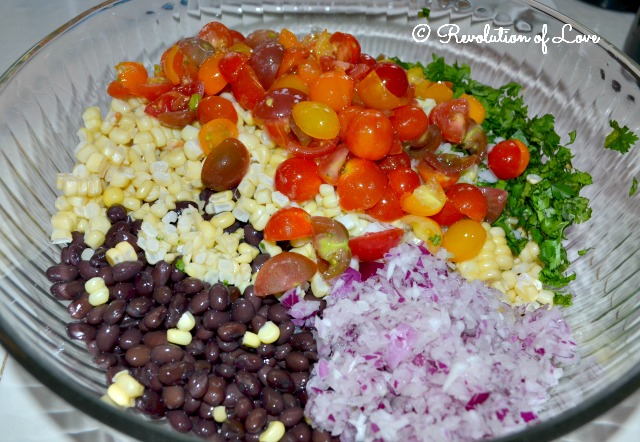
In a large bowl, combine all your ingredients. Stir well. Let sit in the fridge for 20 – 30 minutes before serving.

* If you use cherry tomatoes, you can dice them or simply cut them in half. To remove the excess juice I use a trick I learned from Bobby Flay. After cutting the tomatoes, please them in a colander with a few dashes of salt. Give them a few shakes and let sit for 10-15 minutes. In the meantime, prepare the rest of your ingredients.

** The original recipe has you mix the avocado in the bowl before serving, which is fine if there are no leftovers. Otherwise the avocado gets brown and mushy, even with the lime. When I use avocado I simply add some on top of each serving. The recipe is also tasty without it all together.

However you put it together, the results are the same. Delicious!

* * * * *

Now it’s your turn.

1. Choose your creation, share about it and snap a photo if you can.

2. In your post, link back the original blogger/idea, rather than your Pinterest pin. That way credit goes to the proper person. πŸ™‚ (But feel free to add your Pinterest profile link so we can follow you!)

3. Add a link back here so others can play along.

4. If you want to use it, here is the html code for the logo:

<a href=”http://www.revolutionoflove.com/blog/?p=2157″><img title=”Revolution of Love Blog – Pinterest Party &amp; Link-up” src=”http://www.revolutionoflove.com/blog/wp-content/uploads/2013/04/pinterest_2_medW32-300×240.jpg” alt=”” width=”300″ height=”240″ /></a>

5. Link up below. Make sure you’re sending us to your actual post, and not to your general blog address.

Lastly, you can follow me on Pinterest here: http://pinterest.com/rol_bobbi/. πŸ™‚

The link up will be active for a month. Have fun!

PS – You can follow RoL on Bloglovin, Feedly or another news feed. If you are a social media fan like me, we can stay in touch through Facebook, Twitter, Pinterest, GoodReads, Letterboxd or Instagram. (It’s set to private but I’ll approve you.) πŸ˜‰

PPS – This post may contain affiliate links.


Pinterest Party & Link-up (Vol 25): How I Use PicMonkey on My Blog

Sorry that I missed the last Pinterest Party. I have been on a blogging break but the party is back! This week I am sharing about one of my favorite blogging tools – PicMonkey. πŸ™‚

Welcome to the RoL Pinterest Party. Join me every 2nd and 4th Tuesday as we link up and share how we made, cooked, baked, crafted, planned, organized, followed or created one of the pins on our Pinterest boards OR share something original that others can pin onto their boards.

Not on Pinterest? No problem. Link-up your own creation to inspire us so we can pin in to our own boards. It can be a recipe, sewing project, Catholic craft, homeschool project, organizing/ homemaking tip, themed birthday party, whatever you’d like.

Don’t have a post ready? The link-up will be open for 10 days so there’s still time. Plus, feel free to link up a new post or an older post that hasn’t had much traffic lately. πŸ™‚

* * * * *

A fellow blogger was asking me how I liked PicMonkey and since I’m a big fan I thought a quick post about how I use it blogging would be fun. Although I have Photoshop, for my everyday blogging I use PicMonkey 99% of the time. Here are the top ways I use it.

Crop & Edit

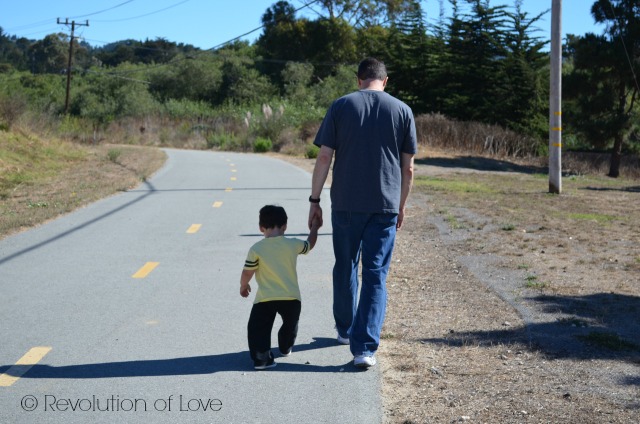
This was the original photo I took. I wanted to crop out the telephone wires and excess background.

I cropped it out and changed the color to black and white for a more classic feel.

This is my original photo.

I cropped the photo, lightened it a little and used the Urban filter to get this.

SIZE NOTE: I usually post my regular phot0s to be 640 in length.

* * *

Add A Copyright

It is super easy to simply add a copyright using your choice of font.

* * *

Word Memes

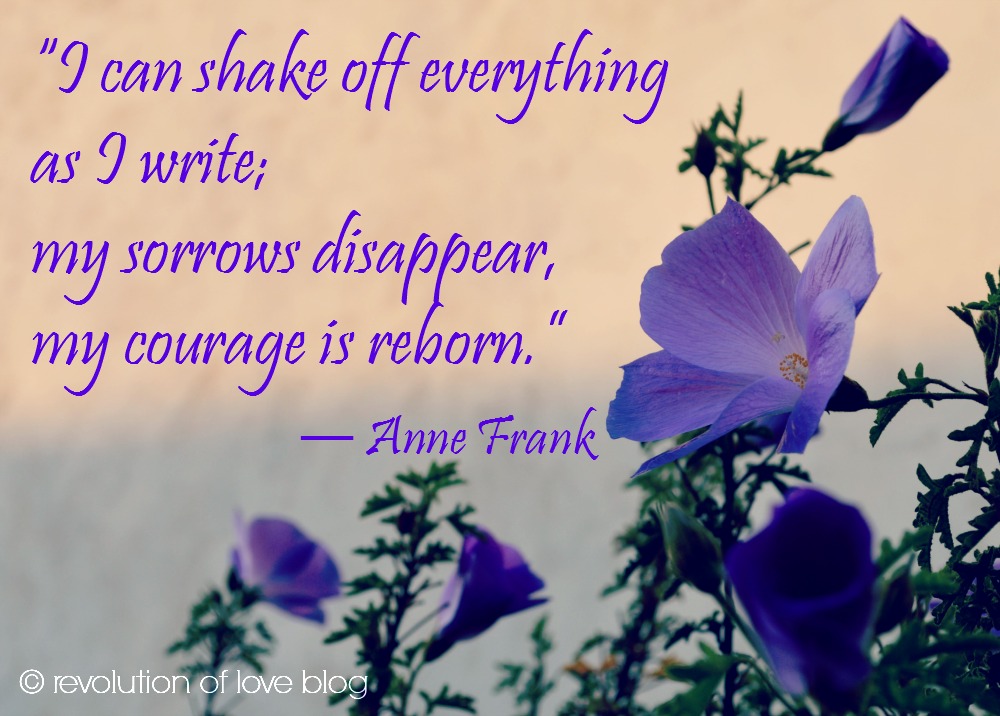
Like adding a copyright, PicMonkey makes it easy to add verses to your photos.

* * *

Make & Add A Watermark

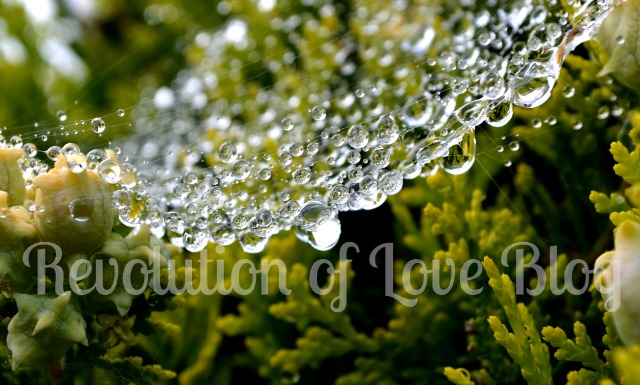
Do you prefer to make a watermark?Β  Here’s how I made a quick and easy one. In PicMonkey, I clicked the Design Tab. Then I clicked the Font tab and wrote Revolution of Love Blog using my signature font. Next I cropped it. Lastly I clicked the Canvas tab and clicked Transparent canvas. I now have a watermark.

To add that to a photo, I followed PicMonkey’s directions found here. It says:

1. Open a photo in PicMonkey.
2. Click the “Overlay” tab on the far left side of the panel (it’s the butterfly).
3. Click “Your Own” at the top of the list of overlays.
4. A box will pop up that allows you to select from the files on your computer. Select your previously created logo or watermark.
5. You can change the color, fade it, erase parts of it, and select one of the preset Blend Modes, or rotate the overlay.

Here is the final result.

* * *

Blog Post Buttons

I am reworking my blog’s side panel and I thought I’d make buttons for the Background Posts.

I chose a photo, resized it, cropped it, added the title, then rounded the corners using the Frame button. Done and done.

SIZE NOTE: My side bar buttons are 300 x 125.

* * *

Facebook Cover

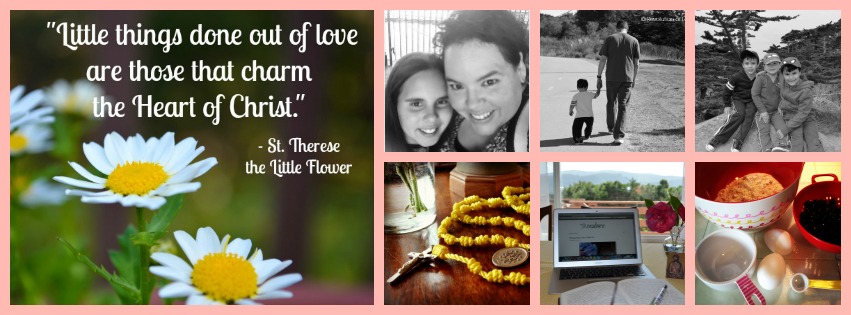
Making a Facebook banner is super easy. Here’s how I made mine. I clicked the Collage button then the FB Cover button. I chose my photos that I wanted to drop into the collage cells. (There are a number of different preset styles you can choose or you can change the cells to make your own style.) Lastly, I edited each photo until it looked right. Viola.

There are lots of ways you can design your collage but instead of giving you detailed instructions, just go to this PicMonkey tutorial page How to Make a Collage for details. πŸ˜‰

* * *

Fun for Font Fans

Photo Credit – PicMonkey

When I browse Pinterest I get giddy when someone posts various free fonts that can be downloaded. I love cute fonts! So I was excited when I found out that I was no longer limited to using the fonts offered on PicMonkey. Any font you have on your computer can be used in PicMonkey. Get the instructions here.

* * *

Β Making Invitations

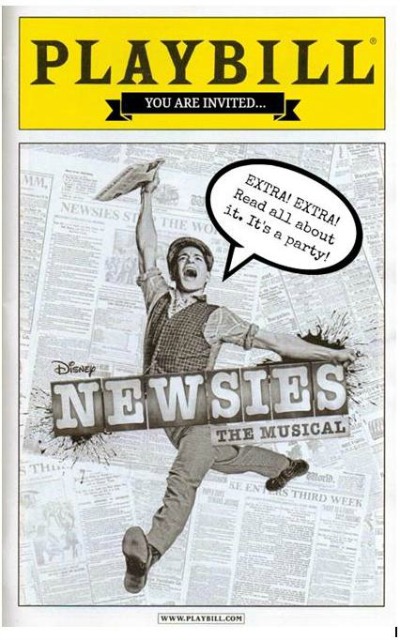
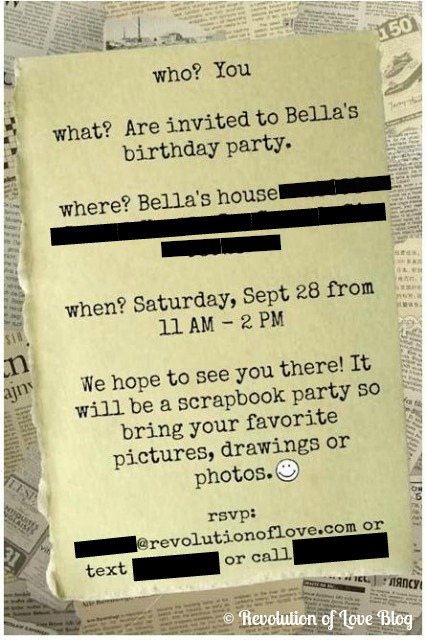
Besides blogging, I have also used PicMonkey to edit my personal photos and to make crafts such as this birthday invitation from Bella’s last birthday. Bella wanted a Newsies (the musical) party so I took a copy of the handbill and using the overlay button (the butterfly) I added the banner and typed in the words “You Are Invited.” I also added the comic bubble and the “Extra! Extra!” bit.

For the inside of the invitation I used as my foundation a photo of various newsprints. I placed the overlay “Paper scrap” over it. I enlarged it and tilted it. Then I typed out the party details.

When we were done we printed them and mailed them out. They came out really cute. πŸ™‚

* * *

So these are some of the ways I use PicMonkey. I am such a fan I signed up for their affiliate program. Go check them out. You can use their basic features for free.Β  If you want the extras and no ads, the Royale features are available for a monthly fee of $4.95 or $33 a year. Right now they are offering a week of Royale for free so you can give it a test run. Enjoy!

PicMonkey Photo editing made of win

* * * * *

Now it’s your turn.

1. Choose your creation, share about it and snap a photo if you can.

2. In your post, link back the original blogger/idea, rather than your Pinterest pin. That way credit goes to the proper person. πŸ™‚ (But feel free to add your Pinterest profile link so we can follow you!)

3. Add a link back here so others can play along.

4. If you want to use it, here is the html code for the logo:

<a href=”http://www.revolutionoflove.com/blog/?p=2157″><img title=”Revolution of Love Blog – Pinterest Party &amp; Link-up” src=”http://www.revolutionoflove.com/blog/wp-content/uploads/2013/04/pinterest_2_medW32-300×240.jpg” alt=”” width=”300″ height=”240″ /></a>

5. Link up below. Make sure you’re sending us to your actual post, and not to your general blog address.

Lastly, you can follow me on Pinterest here: http://pinterest.com/rol_bobbi/. πŸ™‚

The link up will be active for 10 days. Have fun!

PS – You can follow RoL on Bloglovin, Feedly or another news feed. If you are a social media fan like me, we can stay in touch through Facebook, Twitter, Pinterest, GoodReads, Letterboxd or Instagram. (It’s set to private but I’ll approve you.) πŸ˜‰

PPS – This post may contain affiliate links.


Pinterest Party & Link-up (Vol 24): Slow Cooker Chicken Tortilla Soup

Welcome to the RoL Pinterest Party. Join me every 2nd and 4th Tuesday as we link up and share how we made, cooked, baked, crafted, planned, organized, followed or created one of the pins on our Pinterest boards OR share something original that others can pin onto their boards. (New and old posts welcome.)

* * * * *

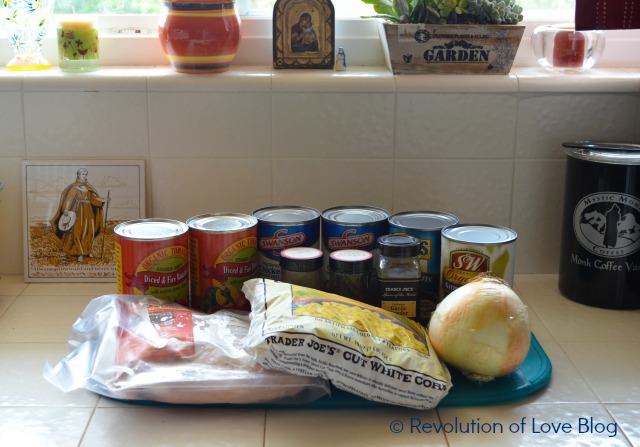
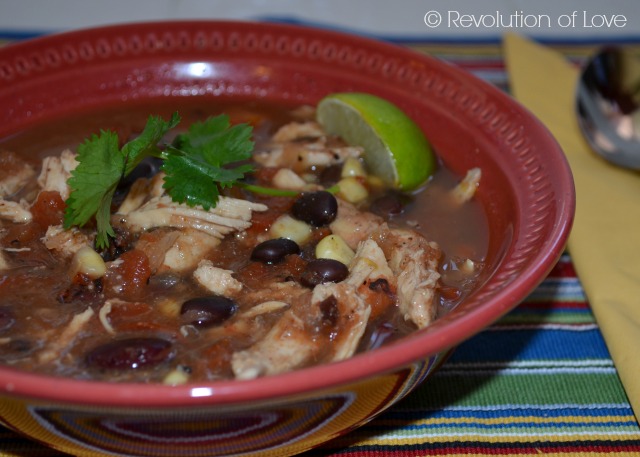
June is a crazy busy month so quick and easy dinners are a must. Lately we’ve had more foggy days than sunny days, so last week I thought I’d try a tortilla soup. I am always on a quest for the perfect tortilla soup. There was a restaurant I went to years ago (can’t even remember the name) and I had the best tasting tortilla soup. Ever since then I have been trying to find a recipe that was similar. This was not the same but it was still good and the family loved it. I adapted the recipe from the original at Fit Mama Real Food.com


Slow Cooker Chicken Tortilla Soup

Ingredients

  • 2-3 boneless skinless chicken breasts
  • 2 cans fire roasted diced tomatoes with green chili
  • 1 can kidney beans, rinsed and drained
  • 1 can black beans, rinsed and drained
  • 2 cans low-sodium chicken broth
  • 1 onion, diced
  • 2 cups fresh (or frozen) corn
  • 1/2 – 1 cups of water (I tend to go less since a lot of water accumulates in the slow cooker.)
  • 1 tbsp garlic powder
  • 1 tbsp cumin
  • 1 tbsp chili powder
  • 1 lime
  • 1 handful of cilantro, stems removed

Directions

Place all ingredients except the chicken in your slow cooker. Place chicken on top. Cover with liquid. Cook on high 4-5 hours or low 8-9 hours. When done, shred the chicken with two forks. Return to slow cooker. Stir.

Serve in bowl. Top with cilantro and the juice of a lime wedge. Enjoy!

(My pin for this recipe is here.)

* * * * *

Now it’s your turn.

1. Choose your creation, share about it and snap a photo if you can.

2. In your post, link back the original blogger/idea, rather than your Pinterest pin. That way credit goes to the proper person. πŸ™‚ (But feel free to add your Pinterest profile link so we can follow you!)

3. Add a link back here so others can play along.

4. If you want to use it, here is the html code for the logo:

<a href=”http://www.revolutionoflove.com/blog/?p=2157″><img title=”Revolution of Love Blog – Pinterest Party &amp; Link-up” src=”http://www.revolutionoflove.com/blog/wp-content/uploads/2013/04/pinterest_2_medW32-300×240.jpg” alt=”” width=”300″ height=”240″ /></a>

5. Link up below. Make sure you’re sending us to your actual post, and not to your general blog address.

Lastly, you can follow me on Pinterest here: http://pinterest.com/rol_bobbi/. πŸ™‚

The link up will be active for 10 days. Have fun!

PS – You can follow RoL on Bloglovin, Feedly or another news feed. If you are a social media fan like me, we can stay in touch through Facebook, Twitter, Pinterest, GoodReads, Letterboxd or Instagram. (It’s set to private but I’ll approve you.) πŸ˜‰

PPS – This post may contain affiliate links.


Pinterest Party & Link-up (Vol 23) and Operation Clean & Organize (vol 19): Weekly Menu Board (Revised)

It’s a two for one post today. I still get a number of hits for the post I wrote three years ago – Operation Clean & Organize: Vol 2 – Weekly Menu Board but I have since updated my menu board so I thought I’d update the post as well.

* * * * *

Welcome to the RoL Pinterest Party. Join me every 2nd and 4th Tuesday as we link up and share how we made, cooked, baked, crafted, planned, organized, followed or created one of the pins on our Pinterest boards OR share something original that others can pin onto their boards. (New and old posts welcome.)

AND

Taming the procrastinating, ADD, mess cat within me.

* * * * *

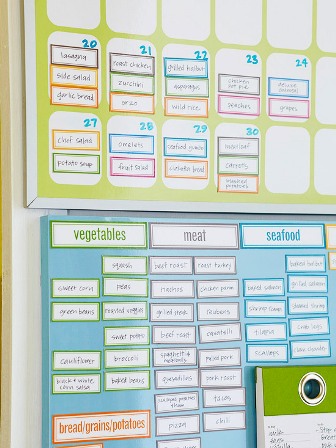
Back in August of 2011, I was looking for a weekly menu board to use in our kitchen. Thanks to Pinterest I finally found this one.

source

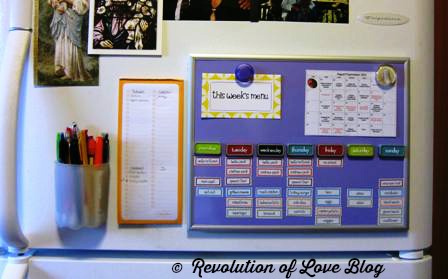
I liked it but it was too big and I wanted it to be weekly not a monthly menu so I decided to make my own smaller magnetic weekly menu. I spent a total of about $20 for a Board Dudes magnetic board the right size to fit on my fridge, a pack of Avery Printable Magnetic Sheets, and “Days of the Week” magnets that I found at Target in the Back to School seasonal section. (You can find similar products at Amazon – Board Dudes Magnetic Board, Board Dudes Days of the Week Magnets and Avery Magnet Sheets.)

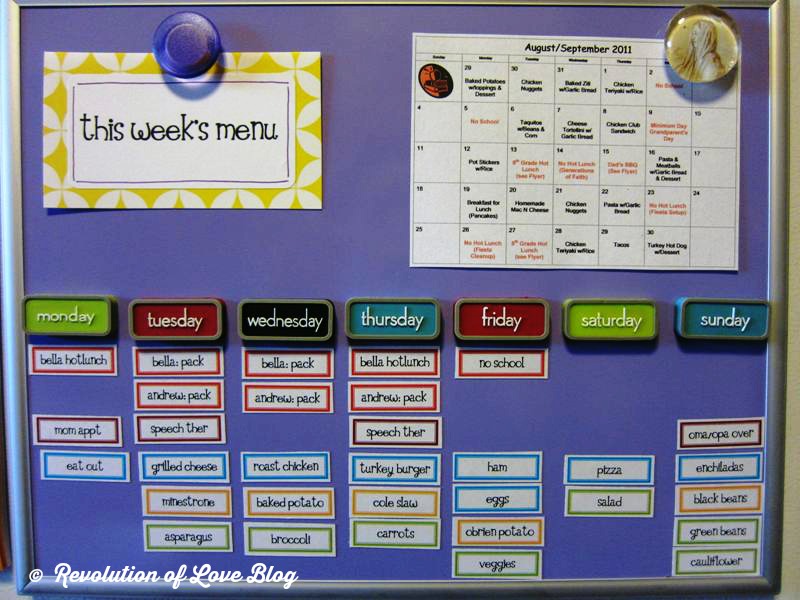
Next I sat down and made a master list of all the meals, side dishes and veggies I normally cook. In a Word document I made four columns of labels and typed up the list of foods. I color coded the labels: main dish – blue, sides – orange, veggies – green, appointments – purple, and school lunches – red. I made sure to have a number of blank labels to fill in later as I tried new recipes. Next, I printed and cut out the labels. Lastly, I arranged the meals on my board along with a shrunken down copy of Bella’s school lunch menu.

Here’s what it looked like then.

Revolution of Love Blog - menu_1W

Revolution of Love Blog - menu_2W

It looked great and worked well for awhile but fast forward three years (and two more kids) later. I still have the same magnetic board BUT the whole magnetic food items were just too time consuming. First, we changed our diet and I had to update or delete old meals. Plus, I was often trying new recipes, which meant I had to make a new label each time. The whole thing was fun while it lasted but not realistic.

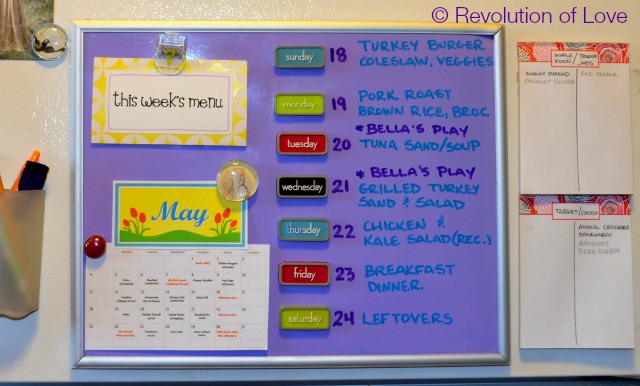
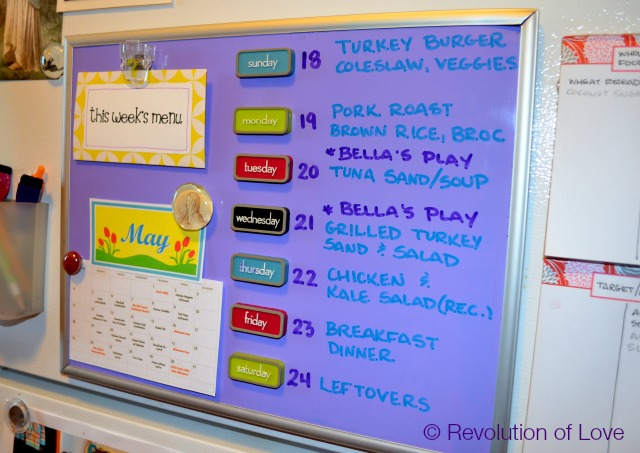
I finally got rid of the food labels and just wrote straight on the board with a dry erase marker.

Now it works perfectly. I still have my shopping list next to the board and I still keep a shrunken version of the kids’ school hot lunch menu there and make note of evenings when we have something planned. If there is a last minute change in the menu I can change it with a quick swish of my finger. (And write in “Chipotles burrito bowls.”) πŸ˜‰

It may not be as pin-worthy as my previous version and perhaps when all the kids are in school and I have more free time I can go back to using the labels but for now, it’s not realistic. Plain and simple yet functional will have to do. πŸ˜‰

* * * * *

Now it’s your turn.

1. Choose your creation, share about it and snap a photo if you can.

2. In your post, link back the original blogger/idea, rather than your Pinterest pin. That way credit goes to the proper person. πŸ™‚ (But feel free to add your Pinterest profile link so we can follow you!)

3. Add a link back here so others can play along.

4. If you want to use it, here is the html code for the logo:

<a href=”http://www.revolutionoflove.com/blog/?p=2157″><img title=”Revolution of Love Blog – Pinterest Party &amp; Link-up” src=”http://www.revolutionoflove.com/blog/wp-content/uploads/2013/04/pinterest_2_medW32-300×240.jpg” alt=”” width=”300″ height=”240″ /></a>

5. Link up below. Make sure you’re sending us to your actual post, and not to your general blog address.

Lastly, you can follow me on Pinterest here: http://pinterest.com/rol_bobbi/. πŸ™‚

The link up will be active for 10 days. Have fun!


PS – You can follow RoL on Bloglovin, Feedly or another news feed. If you are a social media fan like me, we can stay in touch through Facebook, Twitter, Pinterest, GoodReads, Letterboxd or Instagram. (It’s set to private but I’ll approve you.) πŸ˜‰

PPS – This post may contain affiliate links.


Pinterest Party & Link-up (Vol 24): I’m Too Stressed to Be Creative So I Went to the Movies Instead (Mom’s Night Out)

Welcome to the RoL Pinterest Party. Join me every 2nd and 4th Tuesday as we link up and share how we made, cooked, baked, crafted, planned, organized, followed or created one of the pins on our Pinterest boards OR share something original that others can pin onto their boards.

* * * * *

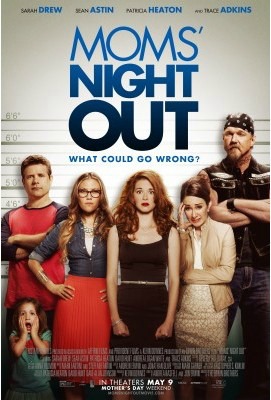
Sorry for the delay on this week’s Pinterest Party! I have been on an unplanned blogging break. Frankly, I have been too busy to even look at Pinterest, let alone try anything new so I am afraid I don’t have any new recipe or bit of creativity to share. Things have been so go, go, go and I have been a little stressed. (I can hear Brian snicker, “A little?!) Add that to a small bout of writers block and you get the picture. No bueno. So last night Brian kicked me out of the house, literally. Lucky for me I had just enough time to catch the evening showing of the new movie Mom’s Night Out.

I was not sure what to expect. It was getting a lot of faith based promotion, and I admit that I assumed it would be on the “lower budget” end of movies, therefore not as good as something mainstream. However, this movie was able to find a balance of being a well made movie and yet it had a positive message – even using speaking about God and Jesus directly without being preachy.

source

In a nutshell, the story is about a mommy blogger (the line about her having four blog followers and she just lost one, had me giggling. ;-)) with three kids. Her view of the perfect mom doesn’t coincide with her own chaotic, messy life. She and two other mommy friends (including Patricia Heaton’s character as the preacher’s wife) decided to go on a Mom’s night out. I thought this first part of the movie was hilarious, especially the voice over, the screen shots of their text messages and the cameo of the Hulk. (I was having a Bruce Banner moment just earlier in the day.)Β  The middle part of the movie is a little far fetched with the whole lost baby scenario but there were also parts that had me laughing my mascara off. (“Say hello to my little sippy cup.” and “He killed mama.”)

However, the conversation between Ally and Bones had me in tears because it was healing to hear that despite whatever limitations we may have, God gave our children just the mama they needed. We were chosen for them. God gives us the grace we need to be a good mom (and wife), we just need to let go of our insecurities and hang ups and instead hang onto Him so we can see the beauty in the mess. πŸ™‚

For a full movie review check out my favorite movie loving nun – Sr. Helen Burns.

And I didn’t see this until this morning but CatholicMom.com also has a number of blog posts regarding the movie in their A Real Life Look series. There’s some great commentary on the movie and mommy life. πŸ™‚

Speaking of CatholicMom.com, I pinned this yesterday. TodayΒ  is the last day of the contest, so join the fun. (But don’t join too many times cuz I really want to win. ;-))

Anyway, this weekend, I’ll try to get a sitter so I can see the movie again with Brian. He’ll love the slap stick comedy parts.

Have you seen the movie yet? What was your favorite scene?

And for the rest of you who were more creative than I was, below is the Pinterest Party link-up. If you did a movie review of Mom’s Night Out, please link it below so I can read it. πŸ™‚

* * * * *

Now it’s your turn.

1. Choose your creation, share about it and snap a photo if you can.

2. In your post, link back the original blogger/idea, rather than your Pinterest pin. That way credit goes to the proper person. πŸ™‚ (But feel free to add your Pinterest profile link so we can follow you!)

3. Add a link back here so others can play along.

4. If you want to use it, here is the html code for the logo:

<a href=”http://www.flove.com/blog/?p=2157″><img title=”Revolution of Love Blog – Pinterest Party &amp; Link-up” src=”http://www.revolutionoflove.com/blog/wp-content/uploads/2013/04/pinterest_2_medW32-300×240.jpg” alt=”” width=”300″ height=”240″ /></a>

5. Link up below. Make sure you’re sending us to your actual post, and not to your general blog address.

You can find me here: http://pinterest.com/rol_bobbi/. πŸ™‚

The link up will be active for a week. Have fun!

PS – You can follow RoL on Bloglovin, Feedly or another news feed. If you are a social media fan like me, we can stay in touch through Facebook, Twitter, Pinterest, GoodReads, Letterboxd or Instagram. πŸ˜‰