Revolution of Love

Revolution of Love

Do small things with great love.

Pinterest Party & Link-up, Vol 4: Pineapple Mango Salsa

Welcome to the new RoL Pinterest Party (formerly Making It Count.) Join me every 2nd and 4th Tuesday as we link up and share how we made, cooked, baked, crafted, did, or created one of the pins on our Pinterest boards.

Not on Pinterest? No problem. Link-up your own creation to inspire us so we can pin in to our own boards. It can be a recipe, sewing project, Catholic craft, homeschool project, organizing/ homemaking tip, themed birthday party, whatever you’d like.

Don’t have a post ready? The link-up will be open for a week so there’s still time. Plus, feel free to link up a new post or an older post that hasn’t had much traffic lately.

Don’t have a blog? No problem. Post your photo and a description on the RoL Favebook page. 🙂

* * * * *

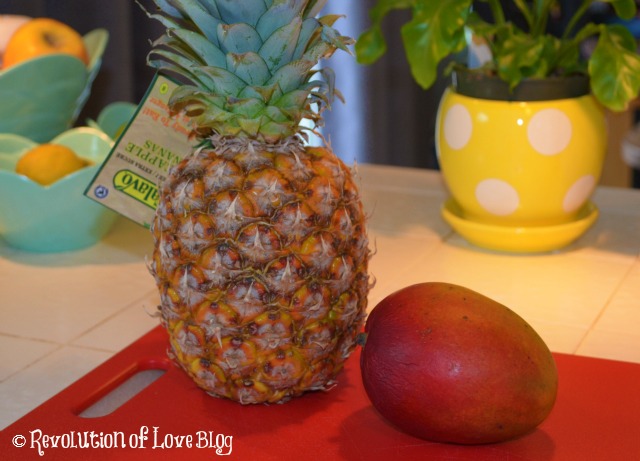
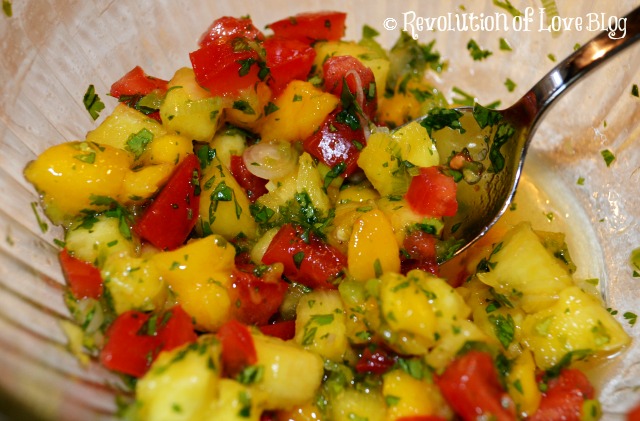
At the beginning of the month I posted about How to Choose Ripe Fruit. I experimented with buying a kiwi, mango and watermelon. I made a comment about only eating canned pineapple and Andrea encouraged me to try a fresh one. I read her post about cutting a pineapple and went for it. I had a mango that was really ripe and needed to be eaten so I decided to make Six Sister’s Pineapple Mango Salsa.

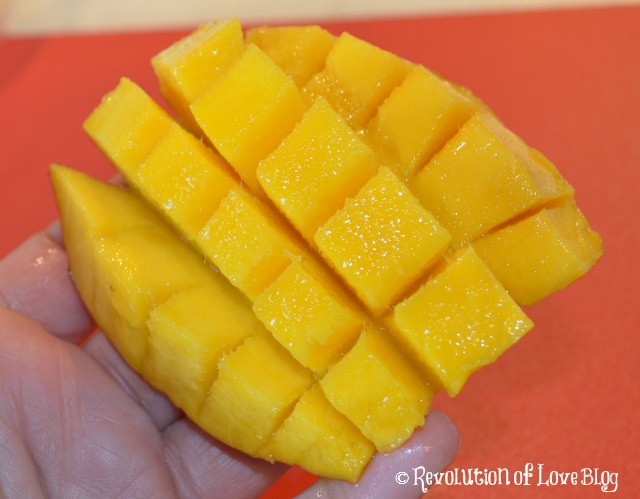
I started with cutting my fruit then I followed the recipe.


Six Sisters Stuff:  Mango Salsa

Ingredients:
1 mango, peeled and chopped
1 cup fresh pineapple, diced (or 1 cup pineapple tidbits, drained)
1 roma tomato, diced
1 teaspoon dried cilantro (or 2 tablespoons fresh cilantro)
2 green onions, sliced
2 tablespoons lime juice
1 tablespoon lemon juice (Note: I actually left of the lemon.)
1 jalapeno pepper, seeded and diced very small

Directions:
“Mix all ingredients together in a bowl. Store covered in the fridge. If you let this sit for a couple of hours before you eat it, the flavors really meld together and taste amazing!”

* * * * *

I followed the directions and it really was tasty! I served it with teriyaki chicken and the combination of sweet from the fruit and heat from the pepper was delicious. I didn’t use the seeds of the pepper so it was not too hot for the kids.

My tip for de-seeding chilies? Use a pair of gloves! I keep a box of latex type gloves in the kitchen and always use them when I cook with chili to keep the juice from getting on my fingers because that would be no bueno!

* * * * *

Now it’s your turn.

1. Choose your creation, share about it and snap a photo if you can.

2. In your post, link back the original blogger/idea, rather than your Pinterest pin. That way credit goes to the proper person. 🙂 (But feel free to add your Pinterest profile link so we can follow you!)

3. Add a link back here so others can play along. Here is the html code:

<a href=”http://www.revolutionoflove.com/blog/?p=2157″><img title=”Revolution of Love Blog – Pinterest Party &amp; Link-up” src=”http://www.revolutionoflove.com/blog/wp-content/uploads/2013/04/pinterest_2_medW32-300×240.jpg” alt=”” width=”300″ height=”240″ /></a>

4. Link up below. Make sure you’re sending us to your actual post, and not to your general blog address.

You have a week to post your link, so if you can’t get things done by Tuesday, no worries, put it up when you can. We’ll be here. Have fun!

Lastly, you can follow me on Pinterest here: http://pinterest.com/rol_bobbi/. 🙂

Follow on Bloglovin


Pinterest Party & Link-up, Vol 1: Strawberry Coconut Cake

Welcome to the new RoL Pinterest Party (formerly Making It Count.) Join me every 2nd and 4th Tuesday as we link up and share how we made, cooked, baked, crafted, did, or created one of the pins on our Pinterest boards.

Not on Pinterest? No problem.  Link-up your own creation to inspire us so we can pin in to our own boards. It can be a recipe, sewing project, Catholic craft, homeschool project, organizing/ homemaking tip, themed birthday party,  whatever you’d like.

Don’t have a post ready? The link-up will be open for a week so there’s still time. Plus, feel free to link up a new post or an older post that hasn’t had much traffic lately. 🙂

* * * * *

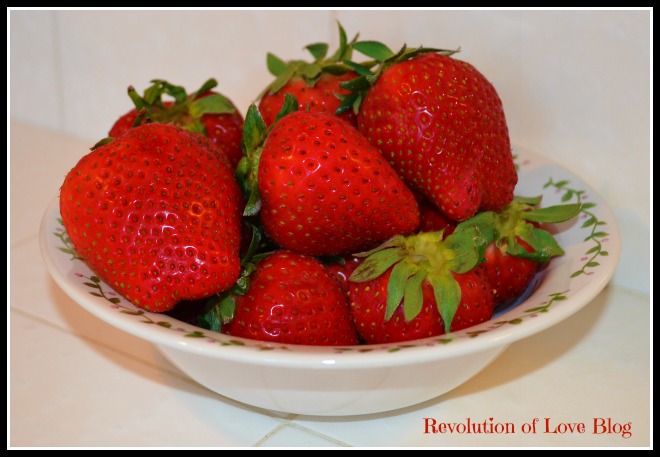
For my contribution this week I wanted to make the family a dessert where I wasn’t worried about calories or fat content. I wanted to make something to celebrate Easter and the warmth of spring and give them a special treat. My father-in-law always goes to to the Farmer’s Market on the weekend and brings us back a big bag of fruit and veggies. This weekend he brought us three containers of fresh strawberries and I knew which pinned recipe I would try to make. It was the Strawberry Coconut Cake I had on my “What’s Baking” Board. The recipe is originally from Candy Jammies and I followed Michele’s recipe, except that I did not have any coconut extract so I just used extra vanilla.

Michelle lists the following Ingredients & Directions.

1 (18.5 ounce) box white cake mix
4 T. strawberry gelatin powder
2 T. all-purpose flour
1 t. baking powder
2 T. granulated sugar
3/4 cup vegetable oil
4 eggs
1/4 c. water
1/2 c. pureed strawberries
1 t. vanilla
1/2 t. coconut extract
1/2 cup fresh strawberries, finely diced
1 c. coconut, finely shredded in food processor
several strawberries to fill cake and garnish

Preheat the oven to 350 degrees F.

Combine dry ingredients in mixer bowl and stir together. Beat in oil, eggs, water, strawberry puree, vanilla, and coconut extract. Mix well. Stir in diced strawberries and coconut. Pour into two 8- or 9-inch round pans, greased and floured. Bake for 25-35 minutes, or until a tooth pick inserted into the center of the cakes comes out clean and the cakes are pulling away from the sides of the pans.

Put pans on wire racks and cool for 10 minutes. Remove from pans and leave on racks to cool completely. While cooling, make icing.

Spread some icing on first layer, then top with sliced strawberries. Place second layer on top and ice the rest of the cake. Cover entire cake in shredded coconut and garnish with fresh strawberries. I don’t tint my coconut pink like in the original recipe, because I think it’s so pretty to cut into the white cake and have the surprise of bright pink inside. I like the contrast of the white icing/coconut and pink cake.

The first time I made this, I did cupcakes. They’re really pretty with a small strawberry on each one.

Cream Cheese Frosting

8 ounces cream cheese, softened
2 sticks (1 cup) butter, softened
2 16-oz. boxes powdered sugar
1 teaspoon vanilla extract

Beat butter and cream cheese until smooth. Add vanilla. Slowly beat in powdered sugar until desired consistency. Add a tablespoon or so of milk if icing is too thick.

* * * * *

Originally I was going to make a sheet cake or cupcakes like Michelle mentioned because the one time I tried a two layer cake it was so bad, I had to erase it from my memory. I didn’t want my debut post to be a total flop but I figured heck, go big or go home. So I went big. I got my first layer done.

And my second layer done.

It was very amateur, somewhat sloppy and looked nothing like Michelle’s fabulous photo but if you took a few steps back and squinted it didn’t look half bad for a rookie. Best of all, it tasted delicious.

* * * * *

Now it’s your turn.

1. Choose your creation, share about it and snap a photo if you can.

2. In your post, link back the original blogger/idea, rather than your Pinterest pin. That way credit goes to the proper person. 🙂 (But feel free to add your Pinterest profile link so we can follow you!)

3. Add a link back here so others can play along. Here is the html code:

<a href=”http://www.revolutionoflove.com/blog/?p=2157″><img title=”Revolution of Love Blog – Pinterest Party &amp; Link-up” src=”http://www.revolutionoflove.com/blog/wp-content/uploads/2013/04/pinterest_2_medW32-300×240.jpg” alt=”” width=”300″ height=”240″ /></a>

4. Link up below. Make sure you’re sending us to your actual post, and not to your general blog address.

You have a week to post your link, so if you can’t get things done by Tuesday, no worries, put it up when you can. We’ll be here. Have fun!

Follow on Bloglovin


Making It Count (Vol 13) & Meatless Meal: Katie’s TJ Chili Cornbread (& Vegetarian Chili)

AND

Today we have a Making It Count Tuesday (Now known as The RoL Pinterest Party & Link-up) and Meatless Meal Mash-Up! If you are new to Making it Count, you simply start with any one of those fabulous ideas you’ve found online. Then, do it. Make it. Cook it. Create it. Take it from the screen, give it life and let it bless your world. When you’re done, snap a photo, write about it and share it with us. Make your time online count! (*NOTE: This is the last Making It Count I will be hosting. Starting in April I will be doing a new Pinterest Party link-up. Details below.)

I am also linking up with Beth Anne’s Best and Tales from Astoria for Meatless Mondays.

Katie’s Trader Joe Chili Cornbread

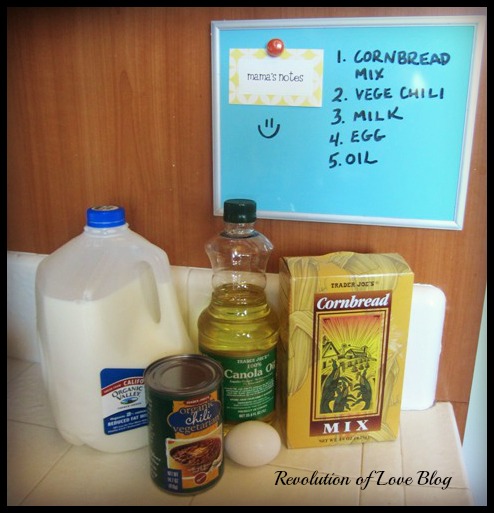
A couple weeks ago I went to a Mom’s Night Out at my friend Katie’s house. She made a delicious spread of food and my favorite dish was a chili cornbread. I asked for the recipe with pen and paper in hand ready to write down all the ingredients. I laughed when she said all I needed was a box of Trader Joe Cornbread Mix and a can of Trader Joe Vegetarian Chili. (For the cornbread you will also need milk, oil and an egg.) Wow, it tasted a lot more complicated than that!

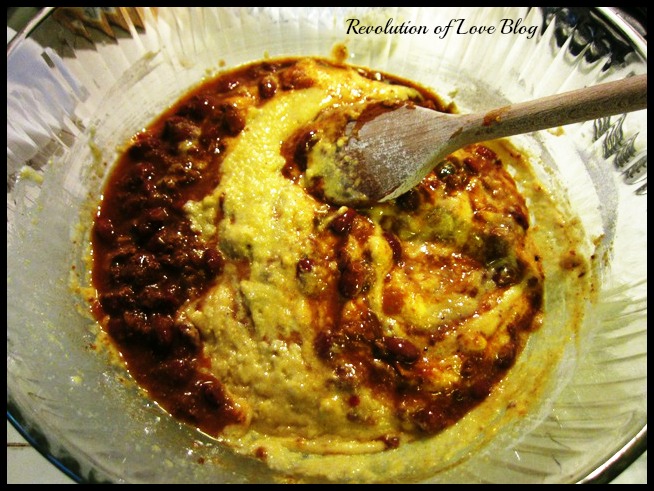
 I mixed together the cornbread mix with the milk, egg and oil. I then added the can of chili.

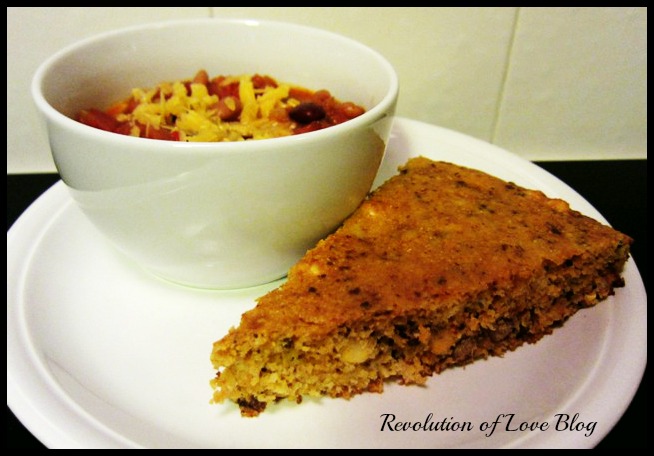
Katie recommended that I use a cast-iron skillet (or stone wear.) I popped it into the oven according to the box directions and about a half hour later this is what I got.

To round out the meal I tried one of my Pinterest chili recipes I had pinned.

Vegetarian Chili from The Curvy Carrot.com

Ingredients:

  • 3 tablespoons canola oil
  • 1 medium onion, chopped fine ( about 1 cup)
  • 1 large red bell pepper, stemmed, seeded, and chopped fine (about 1 1/4 cups)
  • 8 medium cloves garlic, minced
  • 1 tablespoon ground cumin
  • 3 tablespoons chili powder (I used 3 tsp so it wouldn’t be too spicy for the kids.)
  • 1/4 teaspoon cayenne pepper
  • 1 28-ounce can crushed tomatoes
  • 1 teaspoon dried oregano
  • 1 tablespoon brown sugar
  • 3 cups canned beans, drained and rinsed (I used 1 can of red kidney beans and 1 can of pinto beans)
  • 1 cup frozen corn kernels, thawed (I used fresh corn I had leftover.)
  • 1 1/2 teaspoons salt
  • 1/4 cup coarsely chopped fresh cilantro (I ran out of cilantro. Grr.)
  • 1 tablespoon lime juice
  • Cheese, optional
  • Sour cream, optional (I’m not a big sour cream fan so I left it off.)

Instructions:

1. Heat the oil in a large Dutch oven over medium-high heat until about shimmering.

2. Add the onion and cook until translucent and slightly softened, about 3 minutes.

3. Add the red pepper and cook until it and the onion are soft and slightly browned around the edges, about 3 minutes.

4. Add the garlic and cook until fragrant, about 1 minute.

5. Push the vegetables to the perimeter of the pot so that the center of the pot is clear.

6.  Sprinkle the cumin seeds (or ground cumin) into the center of pot and cook for 30 seconds, stirring constantly.

7. Stir the cumin and vegetables together and let cook until the cumin is fragrant, about 1 minute.

8. Add the chili powder and cayenne pepper and stir to coat the vegetables.  Cook until fragrant, about 1 minute.

9.  Add 2 cups water and stir well to combine, scraping up any browned bits from the bottom of the pot.

10.  Bring to a boil, reduce the heat, and simmer until slightly thickened, about 5 minutes.

11.  Stir in the tomatoes, oregano, and brown sugar, and bring back to a simmer.  Simmer until slightly thickened, about 25 minutes.

12. Add the beans and corn and stir gently to incorporate.

13. Remove the pot from the heat and stir in salt, cilantro, and lime juice immediately before serving.

Here is the finished product.

 The photo is not great but the end result was yummy!

* * * * * * * * * * * * * * * * * *

Now it’s your turn.

1. Choose a tutorial, recipe, or idea that has inspired you. Do it and blog a little about it. It doesn’t have to be elaborate — we just want to see what you’ve been up to!
2. In your post, rather than linking to your Pinterest pin, link back the original idea/blogger. We want to be sure that cool idea credit is given to the proper person. 🙂
3. Link back here so others can play along.
4. Link up below. Make sure you’re sending us to your actual post, and not to your general blog address. And please use your own original photo (not someone else’s!) as your thumbnail image. Copyright issues, you know. 😉

Since this is the last Making It Count for March I will leave it up the rest of the month.

Save the date! On April 9 we debut the new RoL Pinterest Party Link-Up where you can showcase a pin you brought to life or link up your own project/creation to inspire others to pin it to their boards. More info coming soon!

Have fun!

* * * * *


Meatless Meal: Soy Charizo Tostadas with Homemade Refried Beans

I am linking up today with Beth Anne’s Best and Tales from Astoria for Meatless Mondays. Last Friday I made tostadas with soy charizo. I don’t usually eat soy, except for once of twice a year during Lent. You could easily make this meal with a can of refried beans but I wanted to make a fresh batch. The recipe I use is super easy. (Note: Excuse the photos. They were snapped in a hurry, sometimes with my phone, but it will give you the general idea.) 😉

In a large stock pot add the following:

  • 16 oz package of dry pinto beans, sorted through (to remove rocks) and rinsed
  • 1 large onion diced
  • 5 garlic cloves, minced
  • 2 bay leaves
  • (You could also add dried chilis but Brian and the kids don’t like things really spicy.)

Cover the beans and ingredients with about 2 inches of water. Bring to a boil. Then simmer for about 2 hours. Add more water if needed as you cook.

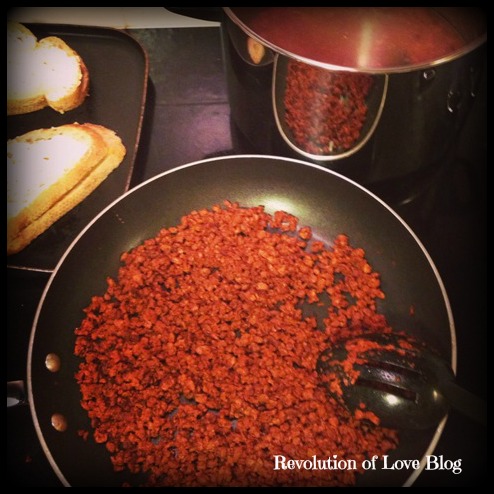
When the bean were done I opened up the charizo, removed the casing and cooked it in a non stick skillet.

Soy Charizo from Trader Joe’s

Beans are simmering. Charizo is cooking. Grilled cheese going for the boys.

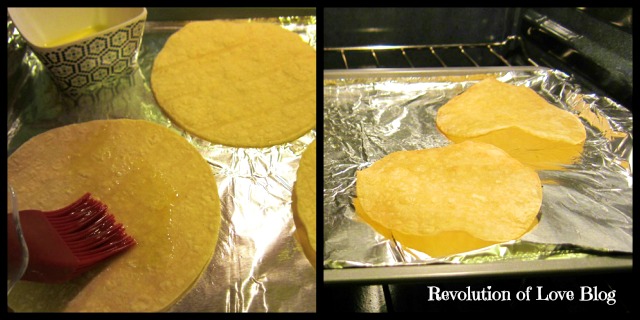
Normally tostada tortillas are fried in oil but I wanted to try a healthier option so I baked some in the oven. I brushed the tortilla with canola oil and placed them in a preheated 400 degree oven. They are supposed to cook in about 5 minutes. Mine were crunchy but still a little chewy. I think I needed to cook them longer to give them more crunch and less chew. I’ll have to experiment on that one more.

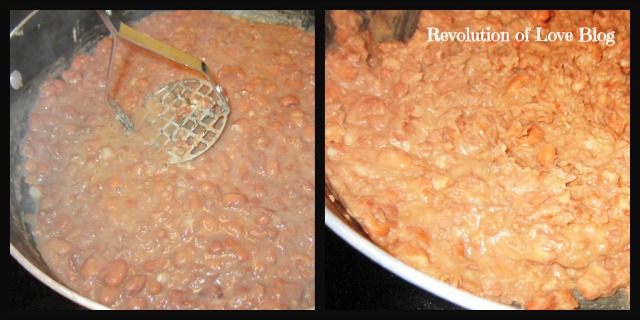
While the tortillas were cooking I made the refried beans. In a pan I heated 1-2 tablespoons of olive oil. I added beans and some of the bean broth. I mashed them, adding more broth as needed until they were the right consistency. Salt and pepper to taste.

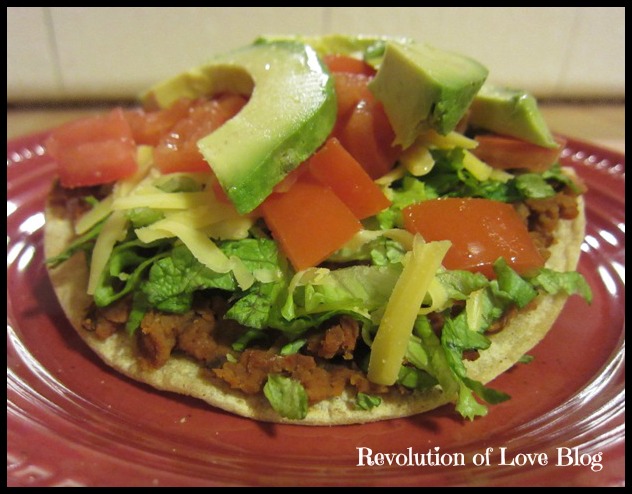
I then added the charizo to the pan and mixed. Then I topped the tortilla with a layer of charizo beans, lettuce, cheese, diced tomatoes and avocados. Yum. 🙂


Making It Count (Vol 12) & Meatless Meals Mash-Up (Vol 2): Minestrone Soup

AND

Today we have a Making It Count Tuesday (Now known as The RoL Pinterest Party & Link-up) and Meatless Meal Mash-Up!

I am linking up with Beth Anne’s Best and Tales from Astoria for Meatless Mondays.

*****

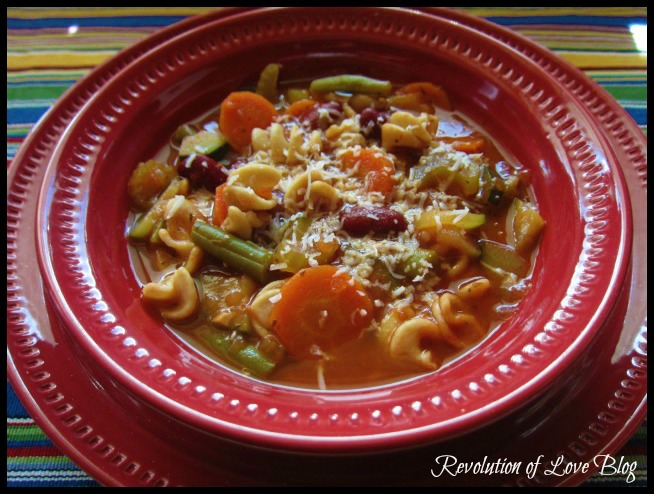
I originally got this Minestrone Soup recipe from my sis and pinned in on my Pinterest What’s Cooking board. I’ve made it a couple times before changing a few things to make it perfect for my family. The original recipe is on the thick side and we wanted a little more broth/liquid in our soup without diluting the flavor. Here is what I put in it.

Ingredients

3 tablespoons olive oil
4 cloves garlic, chopped
2 onions, chopped
2 cups chopped celery
2 cups sliced carrots
4 cups chicken or veggie broth*
1 cup water
4 cups tomato sauce
1 mini bottle of red wine or 1 cup of red wine**
1 cup canned kidney beans, drained
2 handfuls of fresh green beans, cleaned, prepped and blanched***
4 zucchinis, quartered and sliced
1 teaspoon oregano
2 teaspoons basil
salt and pepper to taste
1 cup small sized wheat pasta (ie. shells, rotini etc)
Grated Parmesan cheese for topping

Directions:

1. In a large stock pot, heat olive oil over medium-low heat. Add onion and sauté for 3 to 4 minutes. Add garlic and sauté for 1 to 2 minutes. Add celery and carrots, sauté for 1 to 2 minutes.
2. Add chicken broth, water and tomato sauce. Bring to boil, stirring frequently. Add red wine. Reduce heat to low. Add kidney beans, green beans, zucchini, oregano, basil, salt and pepper. Simmer for 30 to 40 minutes, the longer the better.
3. Meanwhile, cook the pasta until tender. Drain water and set aside.
4. Place a serving spoon of pasta in a bowl. Ladle soup on top of pasta and sprinkle Parmesan cheese on top. Enjoy!

* Obviously, for a Lenten meatless meal, I used veggie broth and it was still really good!

** We aren’t really wine drinkers so I hate opening a big bottle to cook with because we never finished it. Instead I bought a 4-pack of the mini wine bottles, such as the one below, which is a perfect for various recipes.

*** I always blanch my green beans for 7-8 minutes before adding it to the soup. I have never tried throwing them in raw so I don’t know if they’d be tender enough or still a little tough.

This soup is a huge hit with the family, especially when served with a slice of fresh baked bread or ½ a grilled cheese sandwich.

Revolution of Love Blog - minestrone soup

And, you may ask, is it kid friendly? I’ll let Matthew answer that question. 😉

I think those Popeye arms speak volumes. He likes his veggies and pasta!

His messy smile proves it.

* * * * * * * * * * * * * * * * * *

Now it’s your turn.

1. Choose a tutorial, recipe, or idea that has inspired you. Do it and blog a little about it. It doesn’t have to be elaborate — we just want to see what you’ve been up to!
2. In your post, rather than linking to your Pinterest pin, link back the original idea/blogger. We want to be sure that cool idea credit is given to the proper person. 🙂
3. Link back here so others can play along.
4. Link up below. Make sure you’re sending us to your actual post, and not to your general blog address. And please use your own original photo (not someone else’s!) as your thumbnail image. Copyright issues, you know. 😉

You have a week to post your link, so if you can’t get things done by Tuesday, no worries, put it up when you can. We’ll be here. Have fun!

* * * * *

See other Lenten Meatless Meals here.